Some dies have a lot of details which can make removing the small cut pieces difficult. I wanted to show you a little tip that works well for me when cutting with detailed dies. You may still need to use a die brush or paper piercer to remove some little pieces, but the cut will be sharper into the paper with this method. I do two things to make the cuts sharper.
Normally, I would place my paper on top of the standard cutting plate, place the dies (teeth side down) on the paper and then the second standard cutting plate. But let me show you with these photos what I do instead to make the cuts sharper and pieces easier to remove.
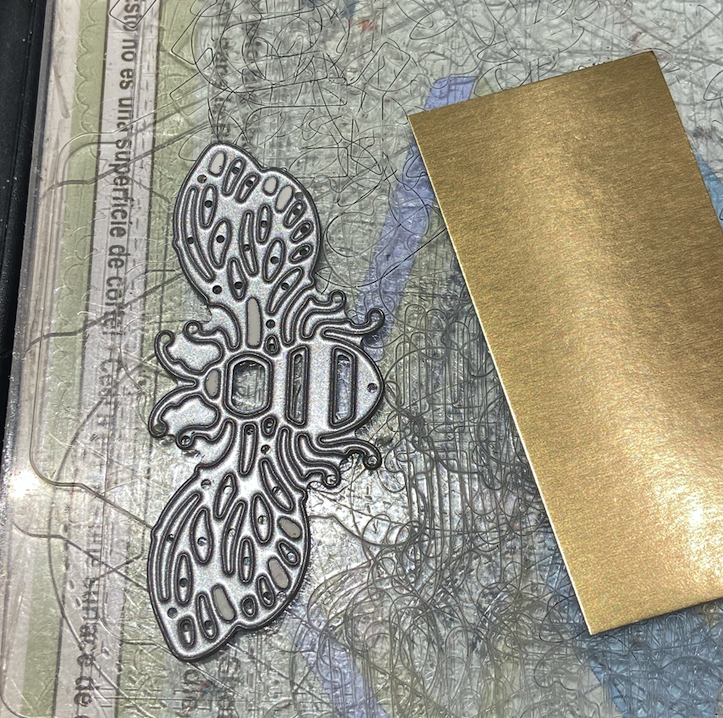
I like to place my dies on either the right or left edge of the platform. The pressure is stronger on the sides than in the middle which helps with the cutting. Place the dies on the first standard cutting plate teeth side UP.
Place the paper on top of the dies. In this case, I am using Gold Foil paper so I place the Gold side facing the teeth of the dies. Place the second cutting plate on top of the paper and crank your embossing machine (in my case a Big Shot).
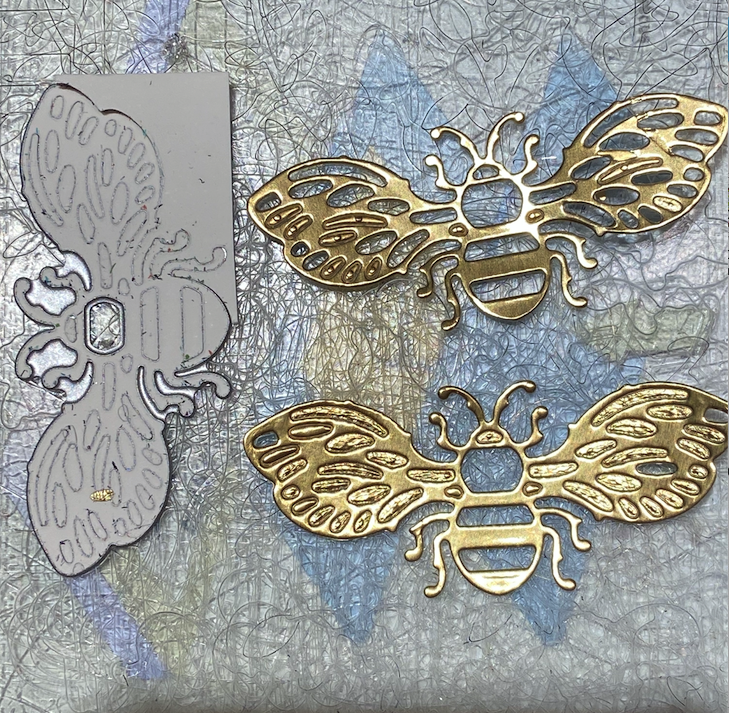
Remove the top cutting plate. You will see in this photo, the top bumblebee has many less detailed cuts remaining than the one below (which was cut the traditional way). The little bits remaining are so much easier to remove.
Would you like to see the projects I made using this bumblebee? You can read the post here – https://mailsomethingpretty.com/bee-card-class-to-go/. To see the videos of the cards, you can visit my YouTube Channel.
I hope this tip on cutting with detailed dies was helpful to you. Did you know that Stampin’ Up! is creating their own embossing & die cutting machine? It will be out this summer and I can’t wait! Be sure you are on my email list so you will hear the upcoming announcements. You can enter your name and email in the box on the right sidebar. Thank you!