If you are curious and interested about stamping (short for rubber stamping), you are in the right place! This post is all about the basics of stamping: how to begin and what you need. Even if you are not a beginner stamper, I encourage you to read this post because you may discover something you didn’t know or remember, just as Kim did:
Amazing post! I’ve been making cards for a few years but learned so much from this. Thanks!!!!! Kim Dorsey
Most of my stamping involves card making. But stamping is a good activity for all types of paper crafting: scrapbooking, favors, treats, gifts and even home decor.
Kits
If you are brand new and don’t have any tools or supplies, I think the best place for you to start are with the all-inclusive kits. (Kits are also great to give as gifts and even for non-beginners, especially when you need a card fast). There are two categories of kits: card kits & crafting kits. Both types of kits are all-inclusive. Everything you need to create cards or projects comes in the box (stamps, ink, a block, paper, envelopes, adhesive and directions). You don’t need to design or prep anything. The kits are 100% assembly. I think kits are a less expensive way of discovering if the stamping hobby is the right one for you too. It can get expensive as you go down the paper crafting rabbit hole of wanting every ink & paper color and tools. After giving the kits a try, you may discover that you want or NEED to go down the paper crafting rabbit hole with me. I’ll be very happy to have you join me and the thousands of others that are there.
You also have the option of receiving monthly kits, rather than a one time kit. These monthly kits are called Paper Pumpkin. Paper Pumpkin is a monthly crafting kit that arrives each month to your mailbox for $22 + tax. Each month is all-inclusive and has videos to watch as well. Each kit is a surprise too, although you can see hints & clues on the theme & type social media. Most months are card kits. There is no time restriction with a Paper Pumpkin subscription. Keep receiving them as long as you want, hold certain months if you need to have a little time off, or cancel at any time.
You made the decision you want to start making your own cards.
Where do you start?
To begin your card making hobby, you’ll need some supplies to make them. The catalogs can be overwhelming and it’s hard to know where to start and what you need…and what in the wold is embossing and dies and fancy folds I keep reading about????? Don’t worry, I’ve got you covered.
Let’s Start with the Basics.
The very basic ingredients of card making are stamps, ink & paper. You can do a lot with just these three things.
Stamps
Stamps. There are A LOT of stamps out there. Stampin’ Up! sells stamps in sets. The sets are usually associated around a theme or season. This way, all of the stamps in the one set work together. As you keep reading, you’ll read a lot about coordination. Stampin’ Up! is known for coordination.
At the beginning, I suggest finding a floral set (because almost everyone likes flowers and you can use them for almost every occasion). If the floral set you choose doesn’t have any words in it, then I would recommend getting an all-occasion word set too.
I am not going to generally recommend a specific stamp set for everyone in this email. Everyone is different and has different styles, so there is no one best set. I am happy to chat with you one on one to help you choose the best sets for you.
There are two types of stamps (and it doesn’t matter which type you buy because they both get the job done of stamping images & sentiments). But, there are slight differences (and techniques you can do) between the two. For both types, you will need to use clear acrylic blocks. I’ll write about the blocks further down in my list.
Cling Stamps (also known as red rubber stamps). These are traditional stamps made with (red) rubber and a foam backing. They are the kind of stamps that were stuck to wood blocks we used as kids.
Photopolymer Stamps. These stamps are made with a medium that is both clear and sticky. They are very thin compared to the red rubber stamps. When using the photopolymer stamps, I like to use a foam mat under my paper to replicate the foam cushion that is a part of the red rubber stamps.
Clear Blocks (acrylic blocks). You need to use these blocks to stick your stamps to when stamping. I really like the Stampin’ Up! blocks because of their nice grip and weight. They come in different sizes and are labeled A – I. You do not need all of them! I suggest you first start with D, C & I blocks. These three should be the right size for about 75% of Stampin’ Up! stamps.
Listed under each stamp set in the catalog is a suggested blocks recommendation. Keep in mind you can always use a larger block for a smaller size stamp, but you can’t use a small block for a larger stamp. So you don’t need all of the blocks suggested. The ones I listed above (D, C & I) are the ones I use the most. I rarely use blocks F and G.
There is another tool option instead of using blocks called a Stamparatus, but let’s leave that tool for the non-beginners.
Cleaning your stamps. There are a few ways and products you can use to remove unused ink from your stamps:
- Stampin’ Scrub & Mist Cleaner. This Scrub has two sides, a wet and a dry. Spray the mist on the wet side, rub your dirty stamp on the scrub and then rub it again on the dry side. Clean and conditioned. Use it to remove all but white ink from your stamps.
- Simply Shammy. Wet the shammy and rub your inked stamps onto it until the ink is off. The ink will remain in the Shammy until you rinse & ring out. Staining will remain, but the Shammy will clean stamps over and over. Store your Shammy in a zip lock bag or an extra standard stamp case. Great for Classic Ink.
- Water. You can rinse your stamps under the kitchen sink with just water. Let air dry. I would use soap & water to wash the white ink and Staz On off your stamps.
- Baby Wipes. Wipe the ink off your stamps with these wipes. Not all that sustainable, so you may want to reserve for certain occasions.
Ink
You will need to put ink (color) on your stamps. There are two types of ink pads: Classic Ink Pads and Specialty Ink Pads. All inks that Stampin’ Up! sells are acid free.
Classic Ink Pads. There are 50 colors to choose from. You don’t need all of the colors. Look at the stamp set/s you chose and think about what colors would work best with it? Do the stamps create a solid image or an outline (to color in)? All of the Classic Ink pads are fast drying, re-fillable, dye & water-based.
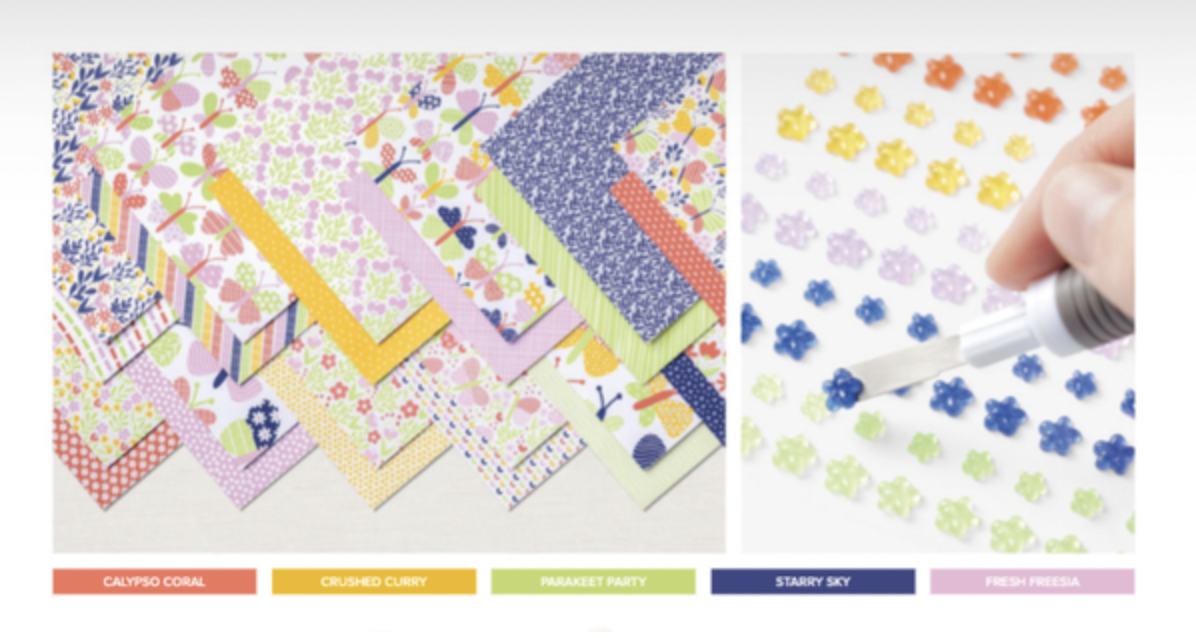
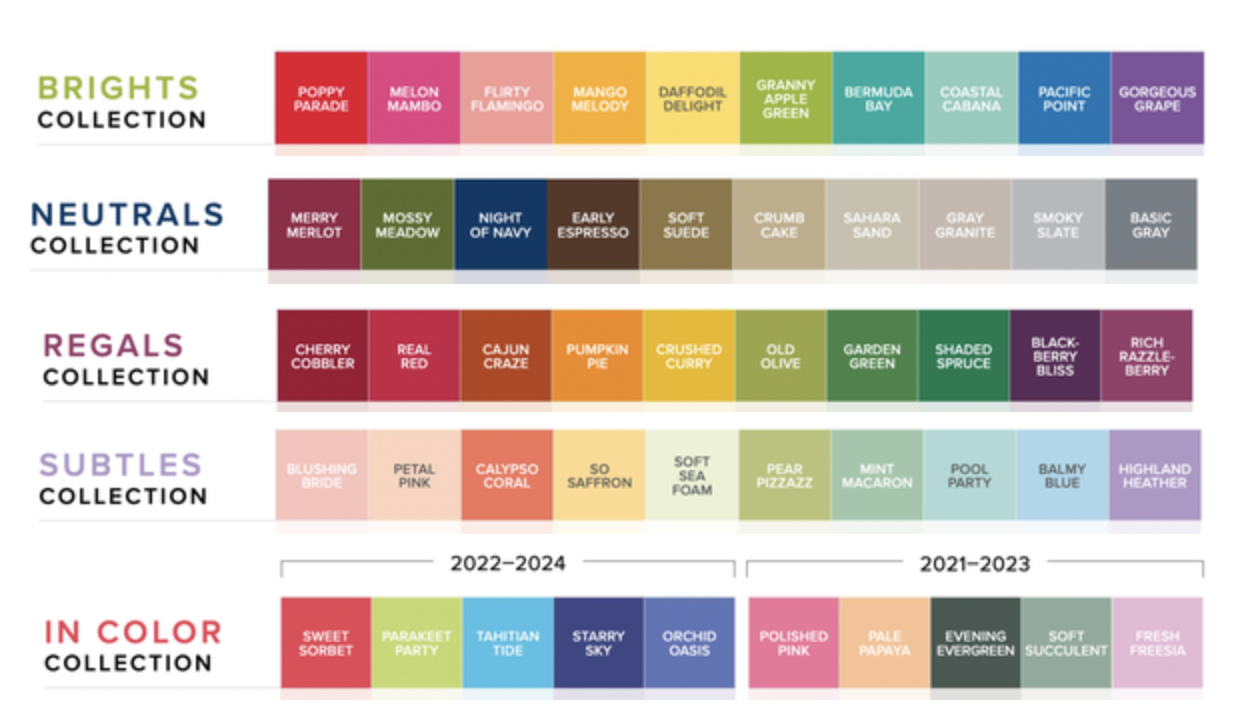
Some colors coordinate better together than others. Stampin’ Up! helps you find coordinating colors with their Color Collections: Brights, Neutrals, Regals, Subtles and In Color. Colors in each collection have the same tone and vibrancy. You can certainly use colors from multiple collections, so don’t let them limit you. Rather, use the Color Collections as a guide. Mixing and choosing colors is one of my favorite processes when designing cards.
You will also notice that Stampin’ Up! makes cross collection suggestions in the catalog. Under many pictures are color swatches they used to make that card/project. Use those swatches as color recommendations for your own cards (they pay artists to come up with them, so you know they are good choices & combinations).
Specialty Inks. The first Specialty Ink pad I would recommend to a beginner is a Black Ink. You have two black choices and both of them are good, they just have different purposes. If you just want a black sentiment or image, then either will be fine. If you want to do some coloring within the black lines, then your choice DOES matter, depending on the coloring tools/method you want to use.
Staz-On Jet Black Ink. This is a permanent, waterproof, alcohol-based ink. This ink will stain your stamps. I think the staining shows you love & use them often. If you want to introduce water with your coloring (such as with watercolor pencils, water painters and the blender pens – not to be confused with Blends Markers), then you will need to use this ink. You can also use this Staz-On ink to stamp on non-porous surfaces such as window sheets, metal, plastic, acrylic, glossy paper, shrink plastic, leather, glass, ceramic surfaces.
There is a Staz-On Cleaner that will remove the staining from your stamps & blocks (as well as many other stains on your table). The staining does not hurt your stamps, so it’s fine to leave alone. I find Staz-On Jet Black to stamp a bit darker than the next black ink, Memento Tuxedo Black.
Memento Tuxedo Black Ink. This is a non-permanent, general purpose ink. This is the ink you want to use when coloring with alcohol based markers, such as the Blends Markers.
White Ink. This is a permanent and pigment ink, which means it’s slow drying. Think of it more as paint. When you want a white image or words stamped on top of colored card stock, this ink is one of two ways to get that (the second way is to use heat embossing). This ink pad comes un-inked, but also includes a refill ink for you to ink the pad with.
VersaMark Ink. You can use this ink in two ways: as a watermark (tone on tone) or for heat embossing. It is a sticky ink (designed this way so the embossing powder sticks to it).
Paper
There are different types of paper: solid card stock, Designer Series Paper (aka patterned paper) and specialty papers. For the beginner, I would focus on the first two. Save that specialty stuff for later.
Solid Card Stock. I mentioned above, that there are 50 color choices for ink pads. For card stock, you get those same 50 colors plus Basic White, Very Vanilla and Black. Card stock comes in the following types of packs:
- One color packs – 24 sheets sized 8-1/2″ x 11″
- Color Collection Assortment packs – 20 sheets sized 8-1/2″ x 11″ (2 sheets of each of the 10 collection colors)
- The Color Collection Assortments, Basic White & Very Vanilla also come in 12″ x 12″ packs. This size is generally used with scrapbooking or 3D projects.
You also have two more choices for Basic White and Very Vanilla:
- Thick Basic White & Thick Very Vanilla. The thick white & vanilla option is the same thickness as the solid color card stock and makes for good card bases. The standard white & vanilla packs are a little thinner, which makes them good for layering pieces. I used to use the standard thickness for card bases years ago, before they came out with the thick option. So the standard White & Vanilla works just fine as a base when you are starting out. Remember I said you don’t need to buy everything?
- Notecards & Envelopes packs in both Basic White & Very Vanilla. These packs are great for the beginner or for quicker cards. The card bases are a little smaller than our usual card size, but they still use a regular postage stamp. You get 20 scored notecards and 20 envelopes in each pack for $7.50. It’s a great value (& time saver).
Designer Series Paper (aka Patterned Paper). Patterned papers give you so many options without doing a whole lot of work. Cut a piece of pretty paper, put it on a solid, plain card base, add a shape with a sentiment and you created a handmade card. Add strips or shapes of different patterns to give a different look. The possibilities with this paper are endless.
Designer Series Paper come in packs of 12 sheets, 2 sheets of each design (total of 12 designs per pack – its double sided). Most packs come in size 12″ x 12″, but some come in 6″ x 6″. All patterns in the particular pack use the same colors, which makes it easier for coordination.
Specialty Papers. These papers vary: foil, metallics, Vellum, glitter, clear and texturized. I use these as if they were embellishments.
You have your stamps, ink & paper, now what?
Great question! There are still a few things to do before you can get stamping.
Mount Your Stamps. If you purchased photopolymer stamps, you can skip this step. Your cling (red rubber) stamps come in a perforated sheet of rubber with stickers on a separate sheet, not on your stamps. There are two ways of mounting your stamps. You can follow the directions on the inside cover of the stamp set, or watch my video which shows how to put the stickers onto the Cling stamps.
Opening Your Ink Pads. If you have never used Stampin’ Up! ink pads before, you may be wondering how to open them. In this video, I show you how to open your ink pads and put stickers on them.
Cutting Paper
I recommend purchasing Stampin’ Up!’s Paper Trimmer. It’s a trimmer I really (honestly) like and it’s a bargain at $25. It’s up to you (& how much cutting you do) to purchase replacement blades at the same time or later on. There are some tricks in making your blades last longer, but as a beginner, your new trimmer will work perfectly and for a long time.
Card bases are generally made out of a half sheet of card stock. Cut at either 5-1/2″ x 8-1/2″, scored in half at 4-1/4″ or cut at 4-1/4″ x 11″ scored at 5-1/2″. Both ways of cutting gives you two card bases.
I made this video years back, but it’s one that is helpful for creating templates for knowing what size layers to use for your cards. I recommend giving it a watch: How to cut & figure out sizes for the layers of a card.
Finding or Coming Up with a Card Design. There are infinite ways of finding card designs to copy exactly or to be inspired by. Here are just a few:
- Copy the card right out of the catalog.
- Copy a card you saw on someone’s social media: Blog, Pinterest Page, FB page or Instagram.
- Do a google search for the name of your stamp set and then click the images option. This method also works for searching for a card theme (ex. birthday cards stampin up, easy kids birthday cards, masculine boat birthday cards, etc. The more descriptive words you put in the search, the better selections google will send you.
- Do a hashtag search. #simplestamping is one Stampin’ Up! created for people who want to make simpler (or beginner) cards using just stamps, ink, paper + one more element.
- Go on YouTube and type in what you want to make.
- Look in magazines or catalogs for color combinations you can use.
There’s one more thing you need before you can begin (well, maybe two). You need some adhesive to stick the papers together. I recommend using Multipurpose Liquid Glue. The glue has two applicators in the one tube: fine tip and glue stick. A little glue goes a long way! It’s very strong. My second adhesive recommendation is to get some Dimensionals. These are little hexagon shaped, sticky foam pieces that will allow your smaller pieces to pop up off the card (i.e. give some dimension). There are other types of adhesives, but these are my top two and the only two you really need.
The second thing you will need are envelopes. They come in Basic White, Very Vanilla and Clear.
Now You are Ready to Start Card Making!
Keep these things in mind:
- There are two sides to every piece of paper, it’s only paper and it’s not meant to be perfect otherwise you would have bought a card.
- Card making (stamping) is supposed to be fun, not stressful! Have some fun, take a breath, don’t worry about perfection, smudges happen and whoever you give it to is going to love it because YOU MADE IT.
- Find a friend to stamp with. It’s really best as a social activity and a calorie burning one with all the laughing that happens (unless of course you introduce the favorite stamping snack of chocolate to the mix).
- Everyone starts with a first card. You will look back on your first card/s and realize that, sure it could have been better, but you’ve learned a lot since that first one. And then you will realize, you still have a lot to learn. No matter how long you have been stamping or what level stamper you are, there is always something new to learn & try.
Just like in anything else you do, it takes time & practice. And speaking of practice, practice stamping on scrap paper. Figure out how much ink you need on the stamp and how much pressure to exert onto the card stock. I recommend putting your stamp in the ink with a “tap, tap, tap” motion. Ink pads come pretty well inked when they are new, so you will have to figure out how much you need.
One more bit of advice for beginners (anyone really)
Every Wednesday at 2pm EST I go live on my Mail Something Pretty facebook page. This week, to coordinate with this email, I will create some beginner cards start to finish. I encourage you to watch live or on the replay each week. If you haven’t already, like my page so you get a notification when I go live. https://www.facebook.com/mailsomethingpretty/
I also invite you to join my facebook group of Very Important Paper Crafters. It’s an online community where everyone posts what they are working on, asks for suggestions/advice and encourages and compliments each other. There is no competition, only cheerleading. Don’t be shy! Post pictures of your creations (even if it’s your first ever card) and positive & encouraging comments on others. We are all at different levels of crafting & creating. Some people copy designs exactly and some design their own. Some people are learning from each other and some are teaching and inspiring. Everyone in the group is kind and isn’t that what the world needs??
Now that you have some background information about stamps, ink and papers, I thought I would give you some more beginner information and stamping tips.
Stampin’ Up! is known for coordination: color coordination & product coordination.
Coordination
Each of the 53 Stampin’ Up! colors have a unique name (you may notice they are all alliterations). All products with that same name are that exact same color. For example, a Real Red ink pad is the exact same color as a Real Red Stampin’ Write Marker, card stock, ribbon, gems, etc. If Real Red is listed as one of the colors in a Designer Series Paper pack, then you know it is the exact same color as everything else listed as Real Red. Each color coordinates with each product of that same color. You don’t have to guess if they match, because their name tells you they do.
Some colors coordinate beautifully with each other. You can try to match colors yourself when coming with a color scheme, or you can follow these three methods:
Find a Designer Series Paper pack you like and use the colors listed in that pack. Each color in that paper pack is listed in the description (online & in the catalog) as well as on the back of the paper pack itself. The Stampin’ Up! Design team already did the hard work of choosing colors for all of the paper pack. Use their expert choices as your own palette.
In the catalogs, there are color swatches listed with many of the samples. Use these pairings when creating your own projects or when deciding on which colors to purchase. Are there commonly used colors? Do certain colors or pairings appeal to you? These colors may be a good place for you to start.
I mentioned Color Collections above. The colors in each collection have the same tone and intensity, which means they work well (coordinate) together. You may want to focus or start on one Color Collection.
You do not have to do all the creative work yourself. Stampin’ Up! does a lot of the work for you. Their products are specifically designed with coordination from the start.
Direct product coordination are always listed in the product descriptions. Bundles are designed to coordinate with each other. Some bundles are stamp sets & punches and others are stamp sets & dies. Purchasing bundles always saves you 10% than purchasing the individual products separately. For the beginner, I suggest stamp set and punch bundle. To use the dies, you need to purchase the Stampin’ Cut and Emboss Machine. A very useful and fun tool, but not necessary for a beginner.
Suite Collections. Suite products are carefully designed to coordinate together in every way. The Suite Collections usually contain a stamp set, punch or die (bundle), Designer Series Paper, accessories and embellishments. All of the products in the suite 100% coordinate with each other. There are usually 2-3 pages in the catalog devoted to an individual suite, including several project samples and a color swatch. The colors of each Suite are also listed in the description, so you can decide if you need to supplement coordinating card stock and/or ink if purchasing.
Two Must Have “Tools”
Every paper crafter should have are sharp Paper Snips (aka scissors). I’ll bet that scissors are in every household. But are sharp, paper crafting scissors in every household?? I’m guessing not. Stampin’ Up! has their own version of Paper Snips and they are a steal at only $10. Before Stampin’ Up! sold them, I would buy paper crafting scissors that were double the price.
You can do a lot with a good pair of Paper Snips: turn a rectangular piece of paper into a banner or pennant, cut out a stamped image (especially important if you don’t have a coordinating punch or die) and cut out printed images from Designer Series Paper.
Crafters call cutting “fussy cutting”. You are either a fan of fussy cutting or not. I happen to be a fan because I really enjoy cutting. I filmed a video a few years ago with some cutting tips – you can watch it here: cutting with scissors, the easy way –
The second “tool” that every paper crafter (in my opinion) should have is Multipurpose Liquid Glue. There are many types of adhesives out there, but I have discovered that this glue can be used on almost every project. It’s a super value at $4 bottle. A little of this glue goes a long way. These tubes can last a long time. Be sure to always put the cap on right after using it, otherwise the glue can clog.
Here is another video showing tips on the Multipurpose Liquid Glue:
Methods of Coloring for Beginners (really, everyone)
As much as you may love all of the colors and want all of the colors, it isn’t necessary. It can be quite expensive to get them all. If you do “want it all”, please reach out to me and I can tell you how you can get all the products you want at a discount.
There is a great (& easy) coloring technique that allows you to use multiple colors on one stamp. You can use Stampin’ Write Markers to color directly on your stamps. This means, you can choose which lines/words get the colors you want. This coloring method works better on outline images rather than solid images. Go ahead and give it a try on solid images, the smaller ones work better than the larger ones. Coloring on stamps also works better on Cling (red rubber) stamps than Photopolymer (although it does work on photopolymer, you just don’t get as deep of a color).
How to do it – Put your stamp on your block and turn it over so you see the stamp. Using the brush side of the Stampin’ Write Marker, color directly on the stamp. Use as many colors as you wish. After you are done coloring the stamp, “huff” on the stamp (this will re-moisten any ink that dried) and press onto your paper.
Stampin’ Write Markers are sold in Color Collections, not individually, packs of either 10 or 5 markers (depending on the Collection). It would cost a lot more money to purchase 10 ink pads than one pack of markers.
This coloring on your stamps method only works with Stampin’ Write Markers. It does not work with Blends Markers. Here is a video I made showing some benefits of Stampin’ Write Markers:
Another way of getting more colors without purchasing all of the ink pads is with Watercolor Pencils. Stampin’ Up! sells two different packs of Watercolor Pencils, Assortment 1 and Assortment 2. Just like I mentioned above, it’s much less expensive to buy a pack or two of Watercolor Pencils than it is to buy the same amount of ink pad colors.
Watercolor Pencils can be used as regular colored pencils. But, they have an additional benefit of adding water to make the colored sections look like you watercolored them.
There are a few things you need to do this. Staz-On Black Ink. Staz-On Ink will not run or bleed when water is introduced. I recommend using either Shimmery White Paper or Watercolor Paper when watercoloring. These papers are thicker than the regular Basic White card stock and are designed to handle water. With larger watercolored areas, regular paper may warp or pill. You can try coloring on Basic or Thick White paper but be sure to introduce water carefully.
You can use a regular paintbrush & water, specifically designed Water Painters or Blender Pens to color over the Watercolor penciled areas to create the watercolor effect.
I’ll have to film a specific Watercolor Pencil Techniques video and share it with you. For now, I’m guessing you can handle coloring with pencils and coloring on top of it with a water brush or Blender pen.
I hope the above tips gives you more information without being overwhelmed. Stamping and creating cards is supposed to be fun and enjoyable, not stressful or overwhelming. It’s also not supposed to be perfect. Each card is handcrafted, unique and made with care (and sometimes love).
I have thrown a lot at you and I don’t want you to feel overwhelmed. Bookmark this page so you can refer back to it when you need it.
Video Tutorials
Be sure to visit my Youtube channel for the many other videos I have created. There are videos for all skill levels and various techniques and products. I’m sure you will find one that will work for you. I add at least three new videos each month, so be sure to subscribe to the channel for notifications of when a new one is posted.