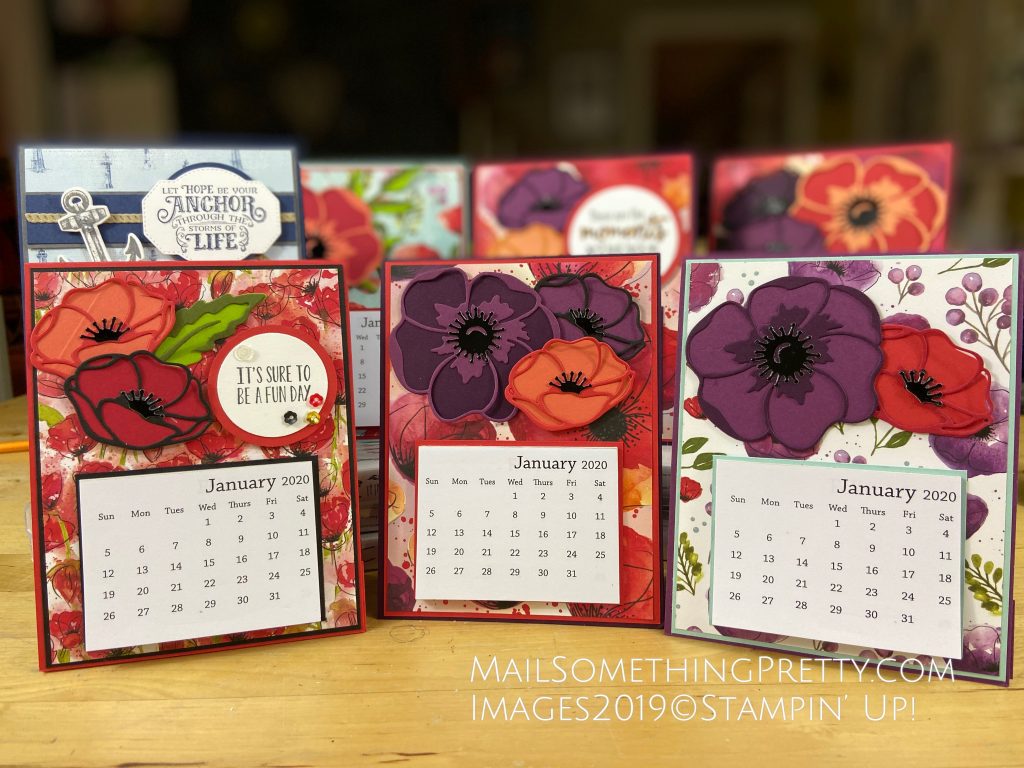
This post was originally posted in December 2019. But the content/tutorial is all still relevant this time of year (just not the poppy paper, but the dies are still available). Enjoy the project! Each month for Club, we make two cards and a 3D project. This month’s 3D project was desktop calendars. They were a big hit! (and really easy to make). We used the new Poppy paper and die set that will be available in January. Any papers and punch outs will work (but I really love the poppies).
I filmed a video on how to make these desktop calendars so you can make them too. I made several that I am giving for Christmas this year. Under the video are the measurements and list of materials I used. Remember, the poppy paper and dies will not be available until January 2, 2020, so they do not have links attached, but they do have item numbers listed.
If you do not have a demonstrator and are interested in receiving this new 2020 catalog, please send me a message and I will be happy to get one to you.
Desktop Calendar Tutorial
Desktop Calendar Supplies & Measurements
Calendar Base 11″ x 4-1/4″, scored at 5/1/2″. I used Blackberry Bliss Card stock.
“W” shaped piece that supports the calendar in upright position, 4-1/4″ x 5″, scored at 1″, 2-1/2″ and 4″. Same color as base.
Patterned Paper 4″ x 5-1/4″, I used paper from the new Peaceful Poppies pack #151324.
Layer under patterned paper 4-1/8″ x 5-3/8″. I used Poppy Parade Card stock.
Layer under calendar 3-1/8″ x 2-3/8″. I used Poppy Parade Card stock.
Poppy Moments Dies #151594
Black Foil Sheets #147898
Multipurpose Liquid Glue #110755
Tear & Tape Adhesive #138995
The new Paper Trimmer #152392 cuts on the 1/8″ marks beautifully
I purchased the 2-1/4″ x 3″ calendars from Taylored Expressions.
I hope you enjoyed these calendars as much as I did! Please let me know how I can help you get started with your projects.