
Are you looking for a cool background technique? I have a fun one for you today that involves masking/painters tape and ink pads. This background looks best with an image stamped in black, like a silhouette. You can vary this technique a little bit with different color choices and darkness levels. Another tip I will show you is how to get a very dark black image using a Stamparatus. Keep reading to see how to make your own Silhouette Cards with Masking Tape Background.
Silhouette Cards with Masking Tape Background Technique
You will want 5 colors and either painters tape or masking tape. The ink will stick to the tape, but not to the paper. Try either a mix of colors or an ombre look. You can re-use the tape a few times for multiple cards. For this card, I am using a piece of Whisper White card stock cut 3-3/4″ x 5″.
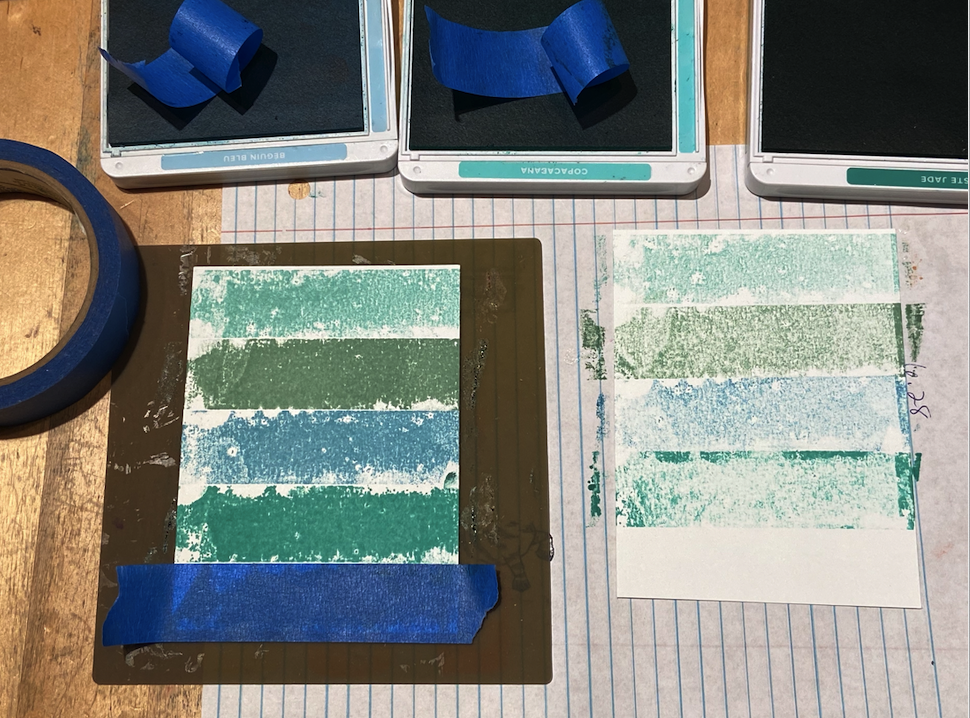
Tear a piece of tape wider than the paper and long enough for your fingers to hold onto each side. Press the tape into the ink pad (I ran my finger over the top of the tape while sitting on the ink) and then press the inked tape onto the paper. I also pressed my finger on top of the tape while on the paper to help with the ink transfer. Carefully lift up the tape. Press the tape onto a second piece of Whisper White card stock (don’t re-ink) to get a lighter look.
Other colors showing the first pressing and the second.
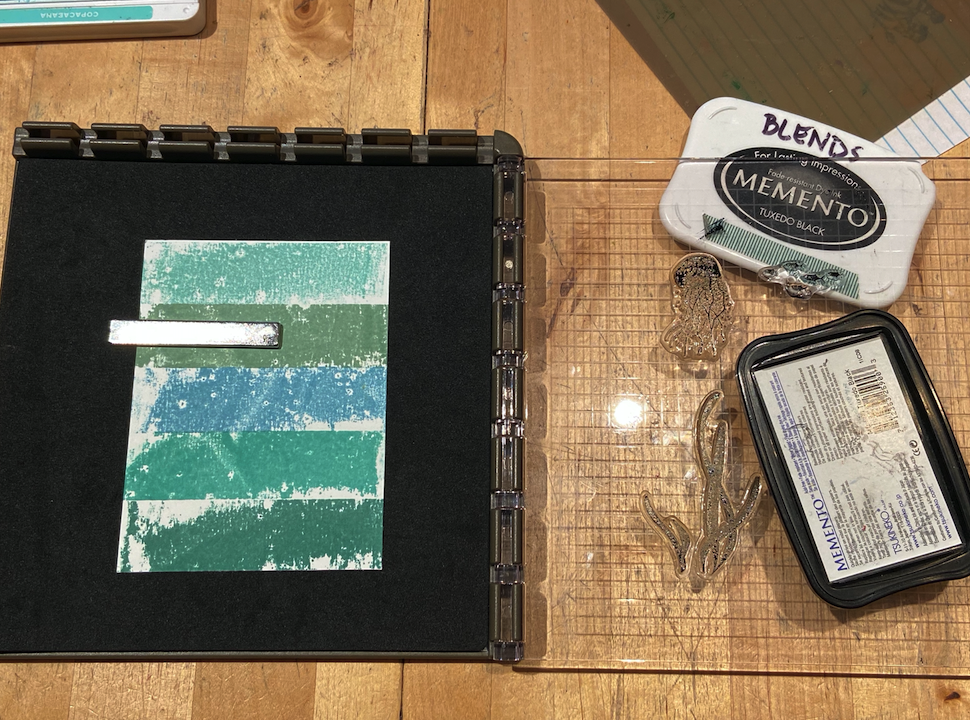
I suggest using a Stamparatus to ink your silhouette images because you can make them very dark black. Placing multiple stamps on the Stamparatus plate at one time makes this an exact and quick process.
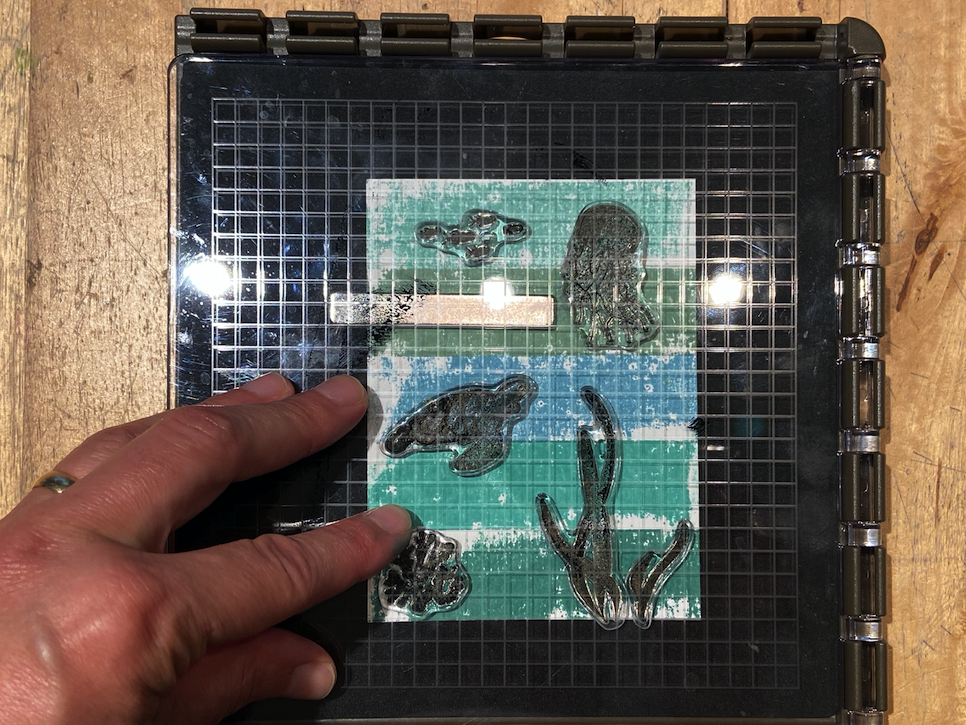
Because you have all your stamps and paper in place, you can re-ink the Stamparatus multiple times to stamp over your images in the exact same place.
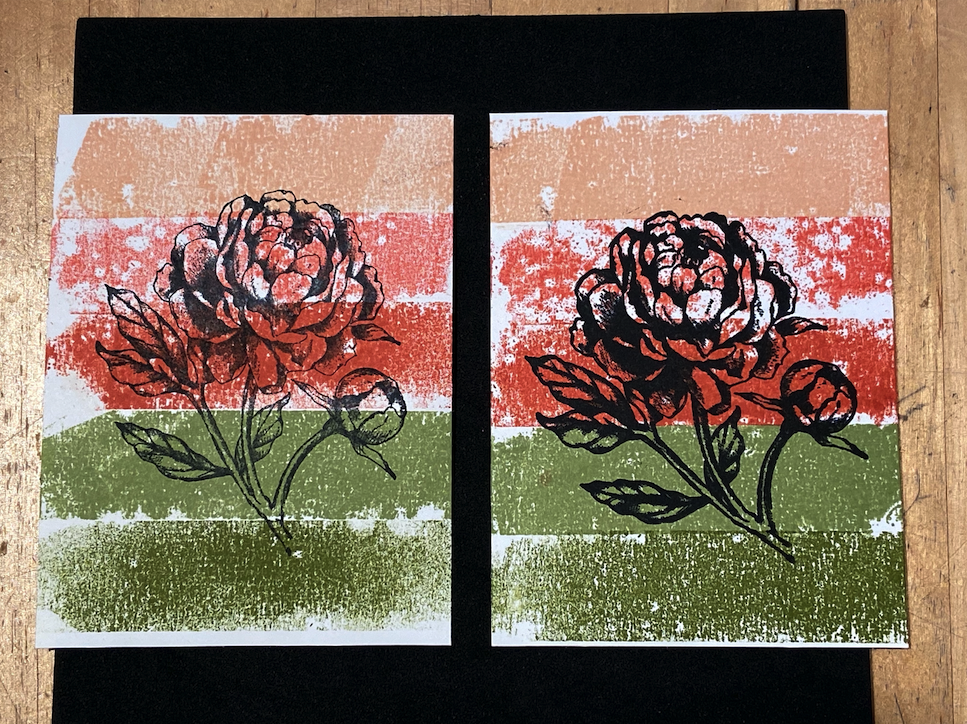
The flower on the left was stamped once. The flower on the right was stamped (& re-inked) three times. This is easily done with the Stamparatus. Notice the boldness of three stampings.
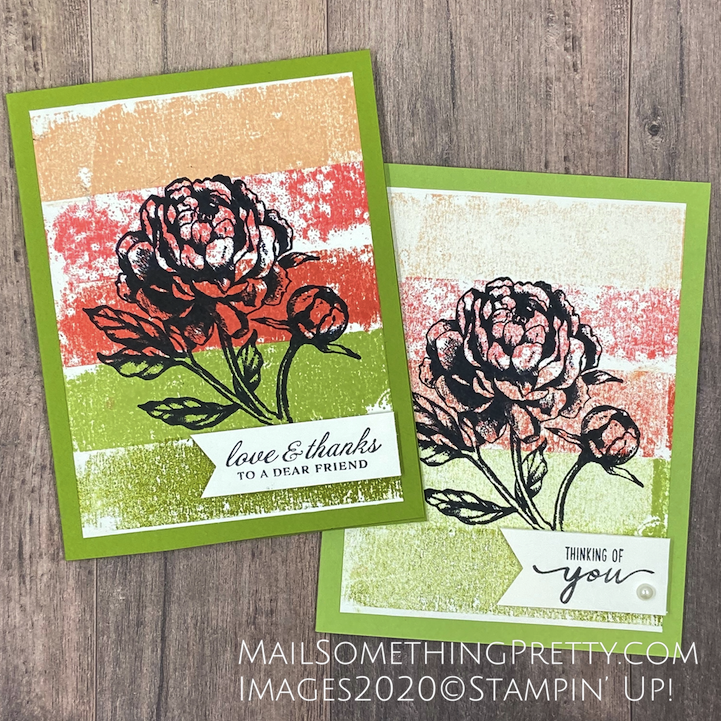
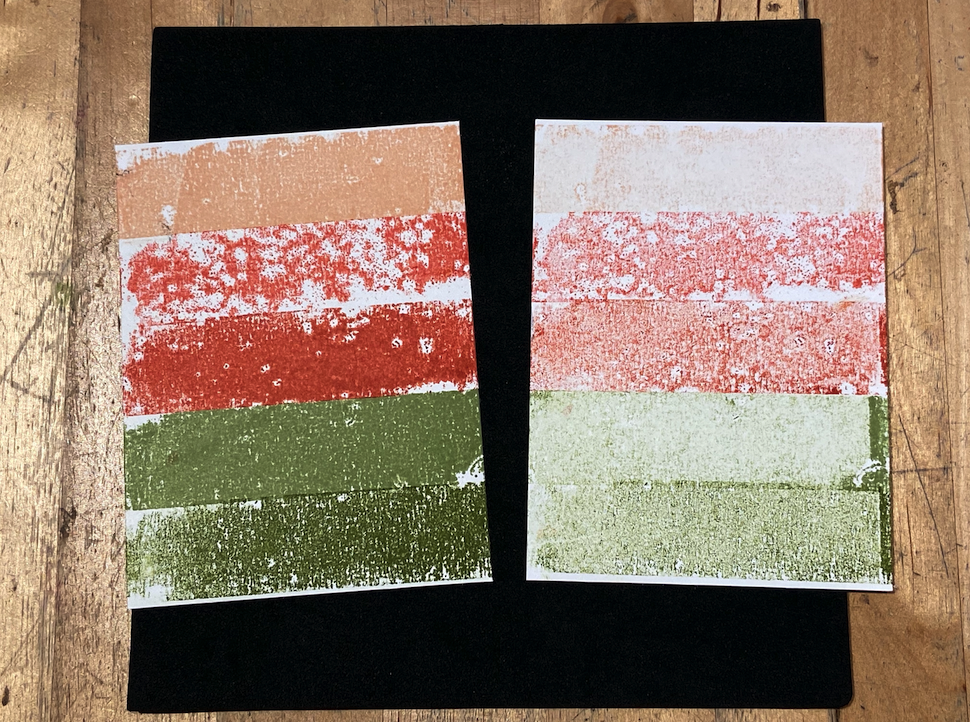
The card on the left is from the first pressing of the masking tape and the card on the right is from the second pressing. Ink colors used from top to bottom: Petal Pink, Flirty Flamingo, Calypso Coral, Pear Pizzazz & Old Olive. Stamp set is Prized Peony. Thinking of You came from Beautiful Moments.
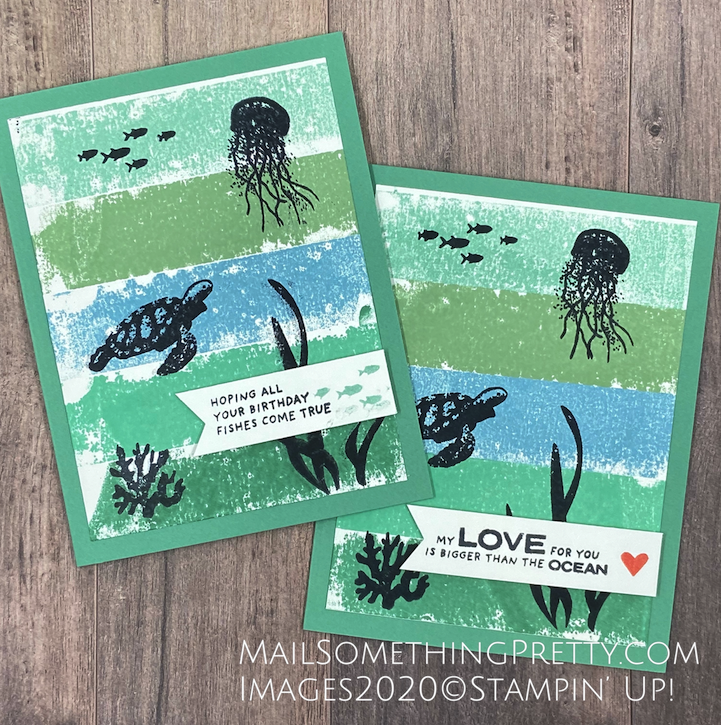
I thought the first pressing was better for this underwater scene so I didn’t include the lighter one. The black images were stamped & re-stamped three times to create a dark, silhouette look. Ink colors used from top to bottom: Pool Party, Mint Macaron, Balmy Blue, Coastal Cabana and Just Jade. Stamp set is Whale Done.
Do you think you want to try this Silhouette Cards with Masking Tape Background technique? Be prepared to have ink fingers!!!
In this post, I showed you two ways a Stamparatus is helpful. To stamp multiple images as once and re-stamping the image multiple times. There are many more ways to use a Stamparatus. And, if you purchase a Stamparatus ($49) and any other item in July, you will earn a $5 Bonus Coupon to use in August. Click on any of the highlighted Stamparatus listings to be connected to my online shopping store.
4 Videos on how to use and what you can do with the Stamparatus:
Stamparatus Technique Series: Video #1 Precision Placement
Stamparatus Technique Series: Video #2 Aligning with Red Rubber Stamps
Stamparatus Technique Series: Video #3 Creating Patterns with the Hinge-Step Technique
Stamparatus Technique Series: Video #4 Stamping on Pre-Die Cut Pieces


I can’t wait to try this. I have some stamps I haven’t found a way to use. This technique is perfect! Thanks for sharing!
I’m so glad you like this technique Wendy, it’s a lot of fun and full of possibilities. Have fun creating!