There are several types of papers you can use for masking: post it notes, copy paper, removable paper and Stampin’ Up!’s very own Masking Paper. Masking is a technique to use when you want to cover up a specific area. You may want stamped images in one area and not in another. You can create perspective by stamping an image, masking (covering up) that area and stamp more images to make them appear behind the masked image. It’s a handy technique! I hope you enjoy this Masking the Center Strip of a Card with Masking Paper post.
For the card I am highlighting below, I wanted the center portion of the card to remain unstamped (and with a distinct clean line) while having stamped images above and below. Masking Paper works perfectly for this look. One tip I will suggest is to make the paper a little less sticky than it is. As you will see in the video, I did this by tapping my Embossing Buddy on top of the sticky paper. The Embossing Buddy is filled with powder. Other options to reduce the stick would be to stick the Masking Paper to the table and then unstick once or twice. The reason I wanted it a bit less sticky is I am covering up a large area and when I pull up the Masking Paper, I didn’t want it to rip the paper underneath. Sometimes you will want the paper to be sticky.
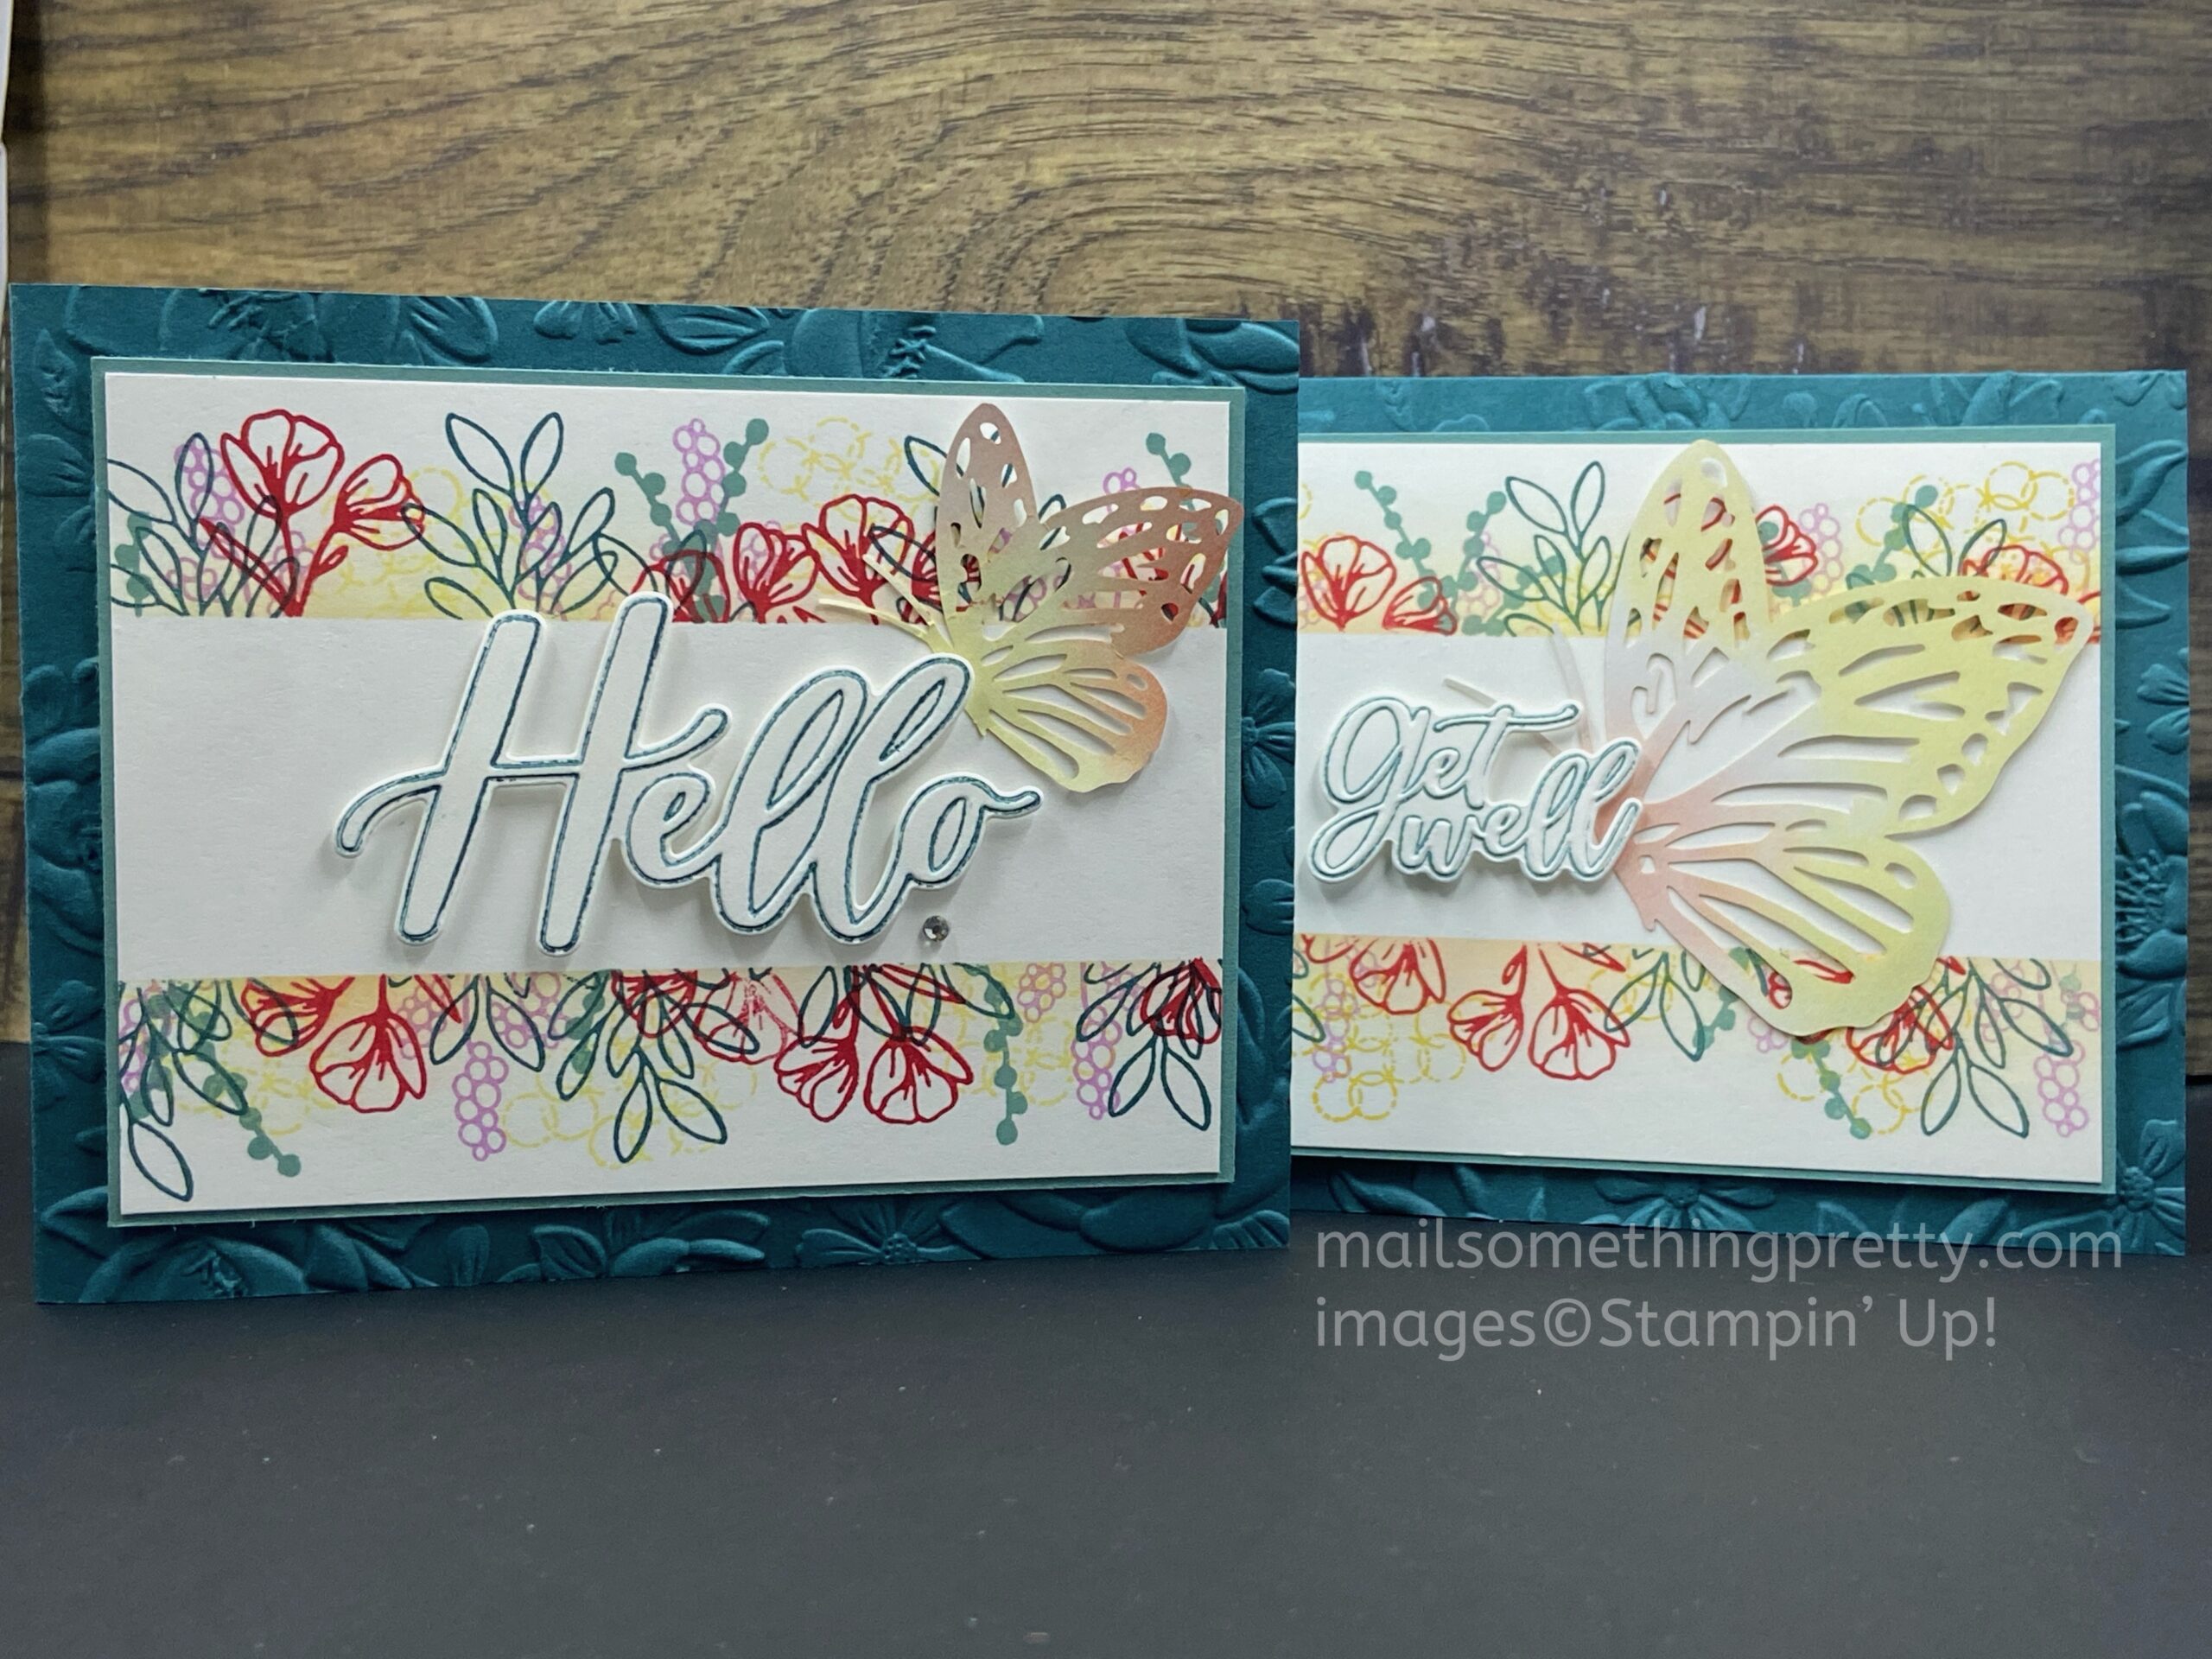
Supplies:
- Masking Paper #155480 (12 sheets 5″ x 7″)
- Pretty Peacock card stock #150880
- Lost Lagoon card stock #133679
- Basic White card stock #159276
- Pretty Peacock Ink #150083
- Poppy Parade Ink #147050
- Fresh Freesia Ink #155611
- Lost Lagoon Ink #161678
- Daffodil Delight Ink #147094
- Paper Butterfly Accents #162612
- Blending Brushes #153611
- Lemon Lolly Ink #161666
- Calypso Coral Ink #147101
- Layered Florals 3D Embossing Folder #162935
- Timeless Arrangements stamp set #161521 (retiring soon but you can use lots of other stamp choices)
- Thoughtful Expressions Hybrid Embossing Folder #162927
- Stampin’ Brayer #162936
- You can purchase any of the supplies listed at www.mailsomethingpretty.com/shop
Measurements:
- Standard card base: 8-1/2″ x 11″ cut in half
- First layer (Lost Lagoon): 4-7/8″ x 3-5/8″”
- White layer: 4-3/4″ x 3-1/2″
- Masking Paper: 5″ x 1-1/2″
Video Tutorial
Do you see how this technique of Masking the Center Strip of a Card with Masking Paper can be used in many different ways with different images and colors? I hope you like it and give it a try. I’d love to hear what you think in the comments section below.
Another Masking Technique
I love to share older videos with you because the techniques are always good until infinity, you just may have to find other supplies to create them with. This card shows a different masking technique that involves Blending Brushes. It’s a fun way of creating a seaside background but you can turn it into a sunset or just a pleasant mix of colors.