Easter time is synonymous with Easter Baskets. Why buy one at the store? You can make your own Easter Basket using the Window Box Thinlits, with just a few easy modifications. This way, you can customize and personalize your basket to any color, and we all know Stampin’ Up! has fantastic coordinating colors!

How to make your basket
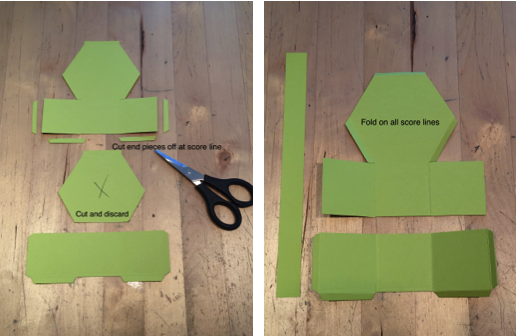
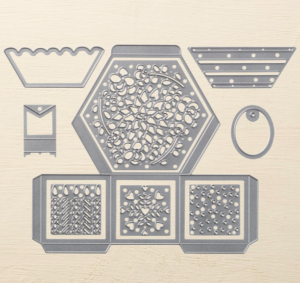
For this basket, you will need a Big Shot and the Window Box Thinlits. Choose your color and cut TWO pieces using the die. I used Lemon Lime Twist for my basket.
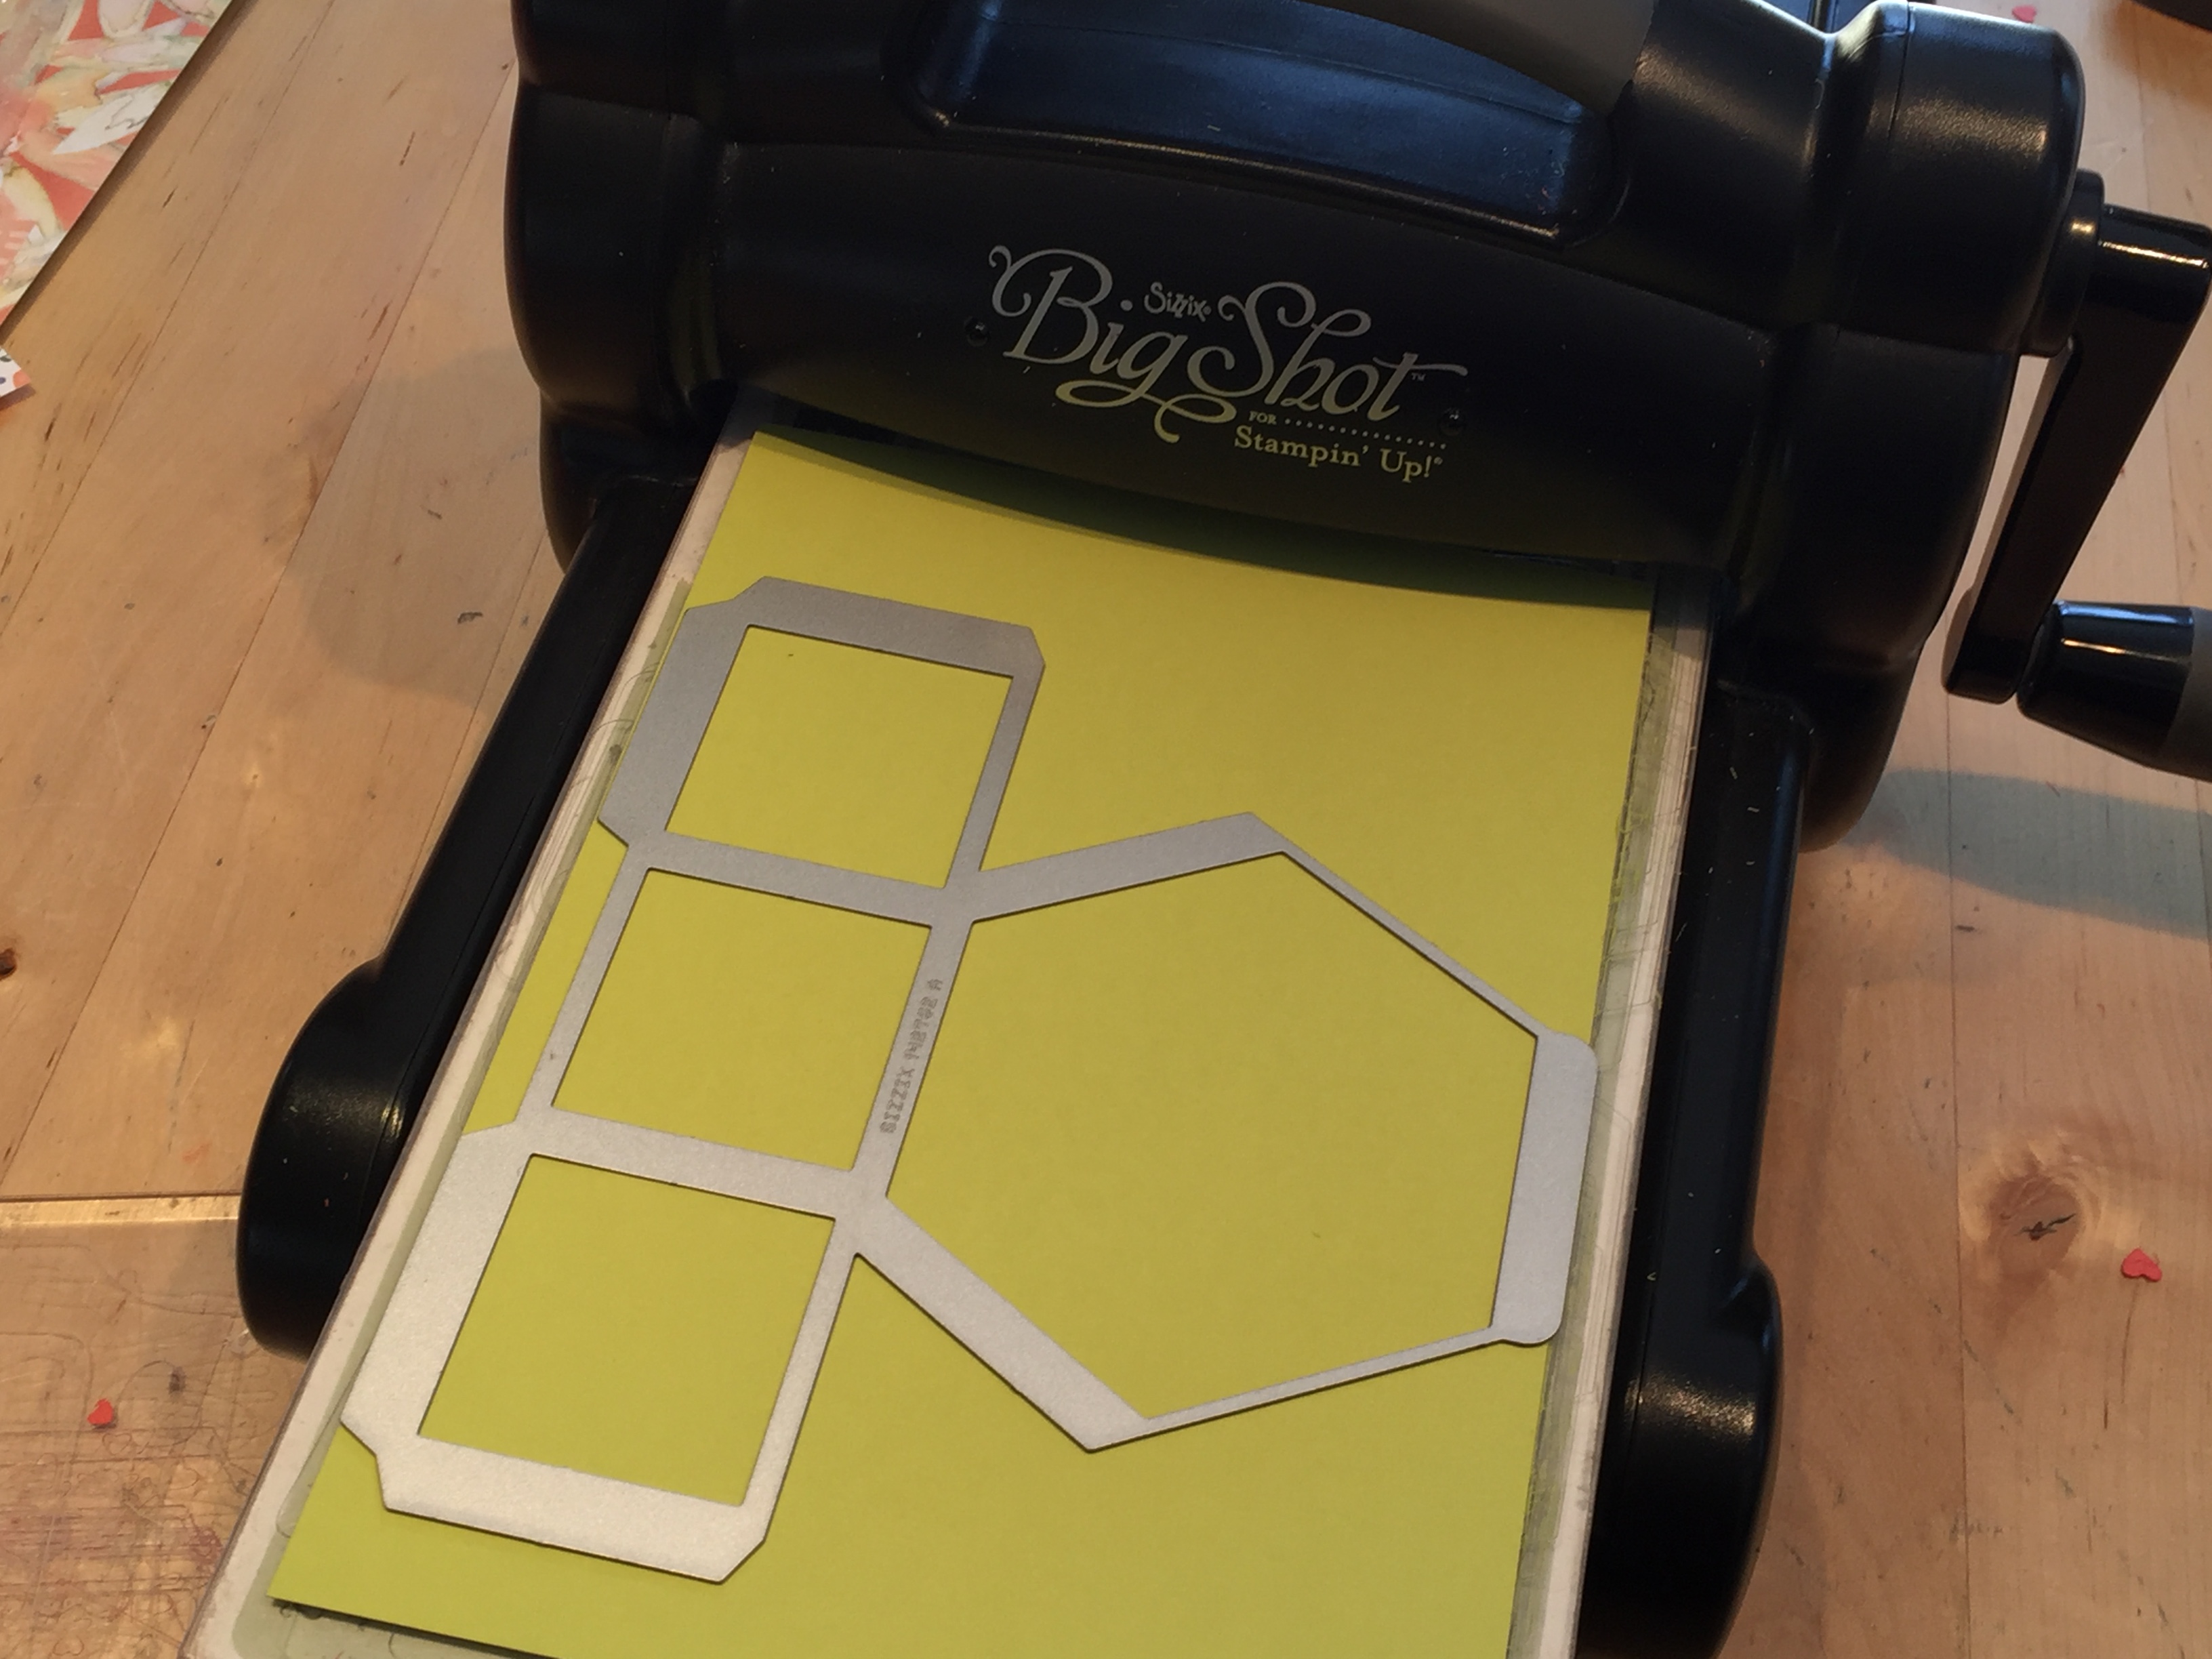
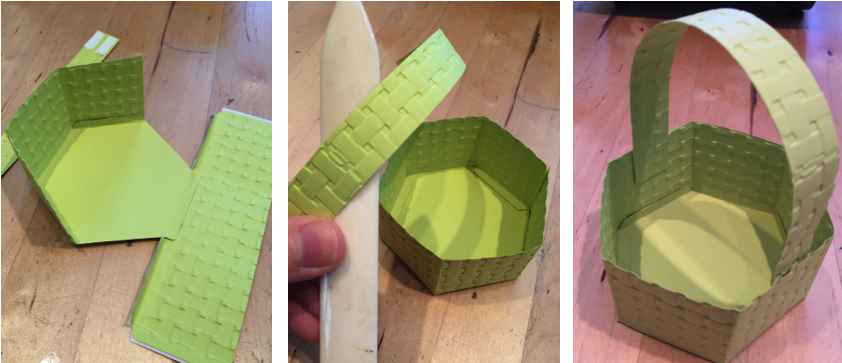
You will end up with two base pieces. Cut and discard the pieces indicated in the first photo. The basket handle piece measures 3/4″ x 8 1/2″. You will want to fold on all score lines, shown in second photo, prior to giving the paper texture.
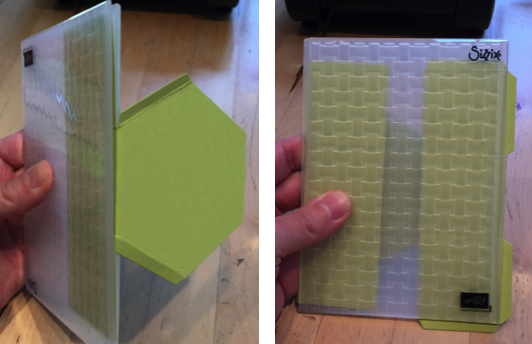
Next, run the pieces through the Big Shot with the Basket Weave Dynamic Embossing Folder*. You can omit this step if you want to leave your basket without texture.
The larger piece is too big to put in the embossing folder & Big Shot as is, so fold the hexagon-shaped piece over the folder. There’s no need for this piece to be textured because it will be the bottom of the basket. I put the other piece in the folder at the same time, keeping the tab edges outside the folder, second photo (this makes it easier for the adhesive to stick when assembling).
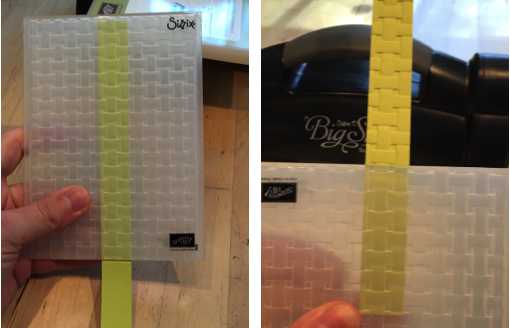
The handle is also too long to fit in the embossing folder, so put it in as far as it can reach and run it through the Big Shot. Flip it around, line up the textured pattern, and run it through the Big Shot again.
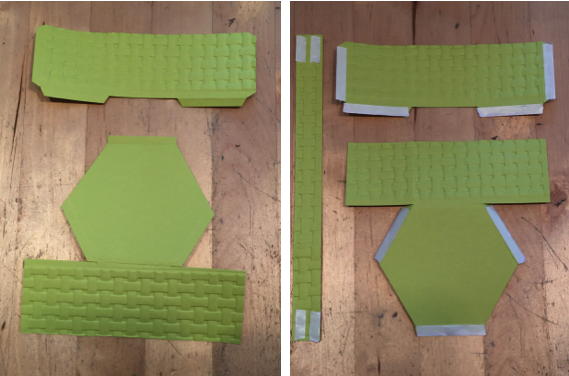
Shown are the pieces with the textured patterns. You will want to use a strong adhesive, such as Tear & Tape, and apply where it is shown in the second photograph. Put the adhesive on the textured side you want to see, aka the right side.
You will need to adhere the two bases together and then fold the edges around to meet each other. The basket really comes together quite easily. I used my bone folder with the basket handle to give it a nice curve. Adhere your handle to the inside of the basket and viola! A perfect sized Easter basket for just the right amount of candy.
I used the Daisy Delight bundle (stamp set & punch) to make a three layered flower. I also used coordinating Lemon Lime Twist ribbon to tie a knot, just above the flower. The Sweet Soiree Ready Shreddie is the perfect stuffing for this basket. It comes with three colors: white, silver and Berry Burst. I coordinated the Berry Burst ink on my daisy and with the shreddie. 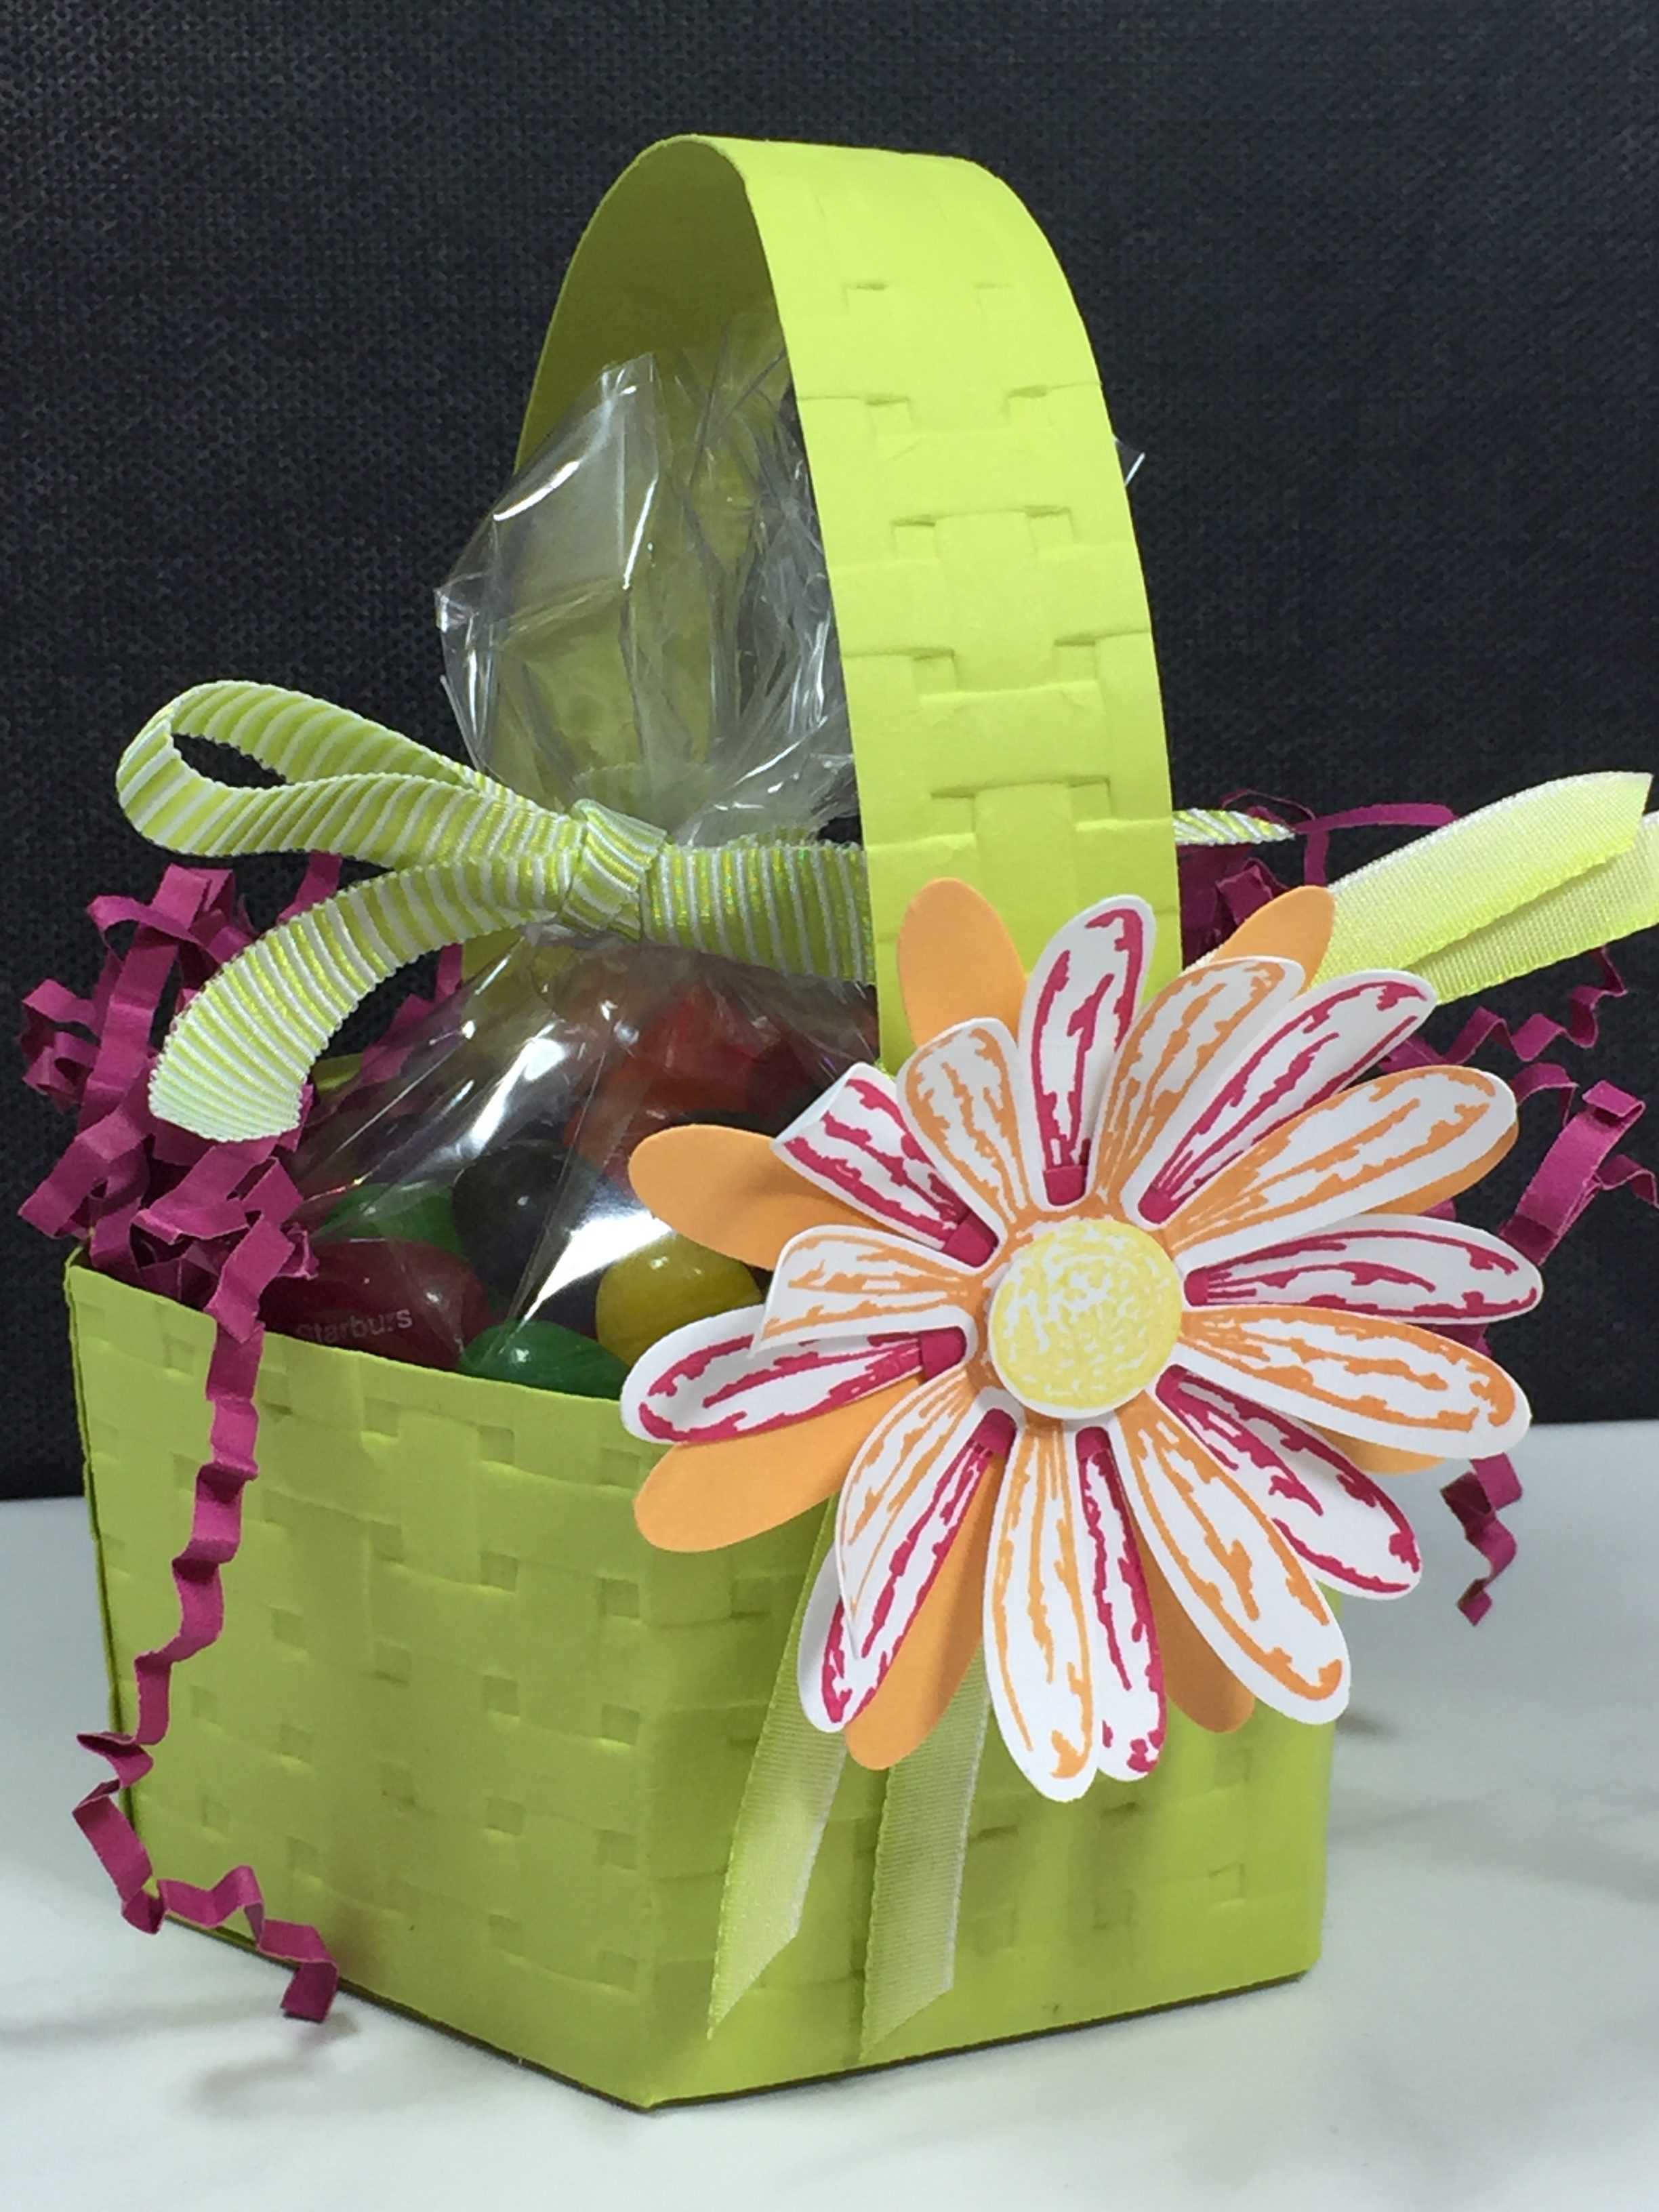
Other Options
Click here (https://mailsomethingpretty.com/window-box) to see an earlier post of a box I made with the Window Box Thinlits. This die is really quite versatile, fun and you can make all sorts of designs and shapes. Literally think outside the box!
There is also a coordinating stamp set, Window Shopping, that works beautifully with this set of dies. Although each stands alone too. 
*The Basket Weave Dynamic embossing folder is, at this writing, an exclusive level two Sale-a-bration item. Available for free with a $100 order until March 31, 2018. But, it will be an available product to purchase in the 2018/19 Annual catalog. Details on Sale-a-Bration can be read HERE.
I invite you to make your own Easter Basket using the Window Box Thinlits as well as try all the other box shapes you can make with these dies. Be sure to comment on my tutorial and let me know how your basket turns out.