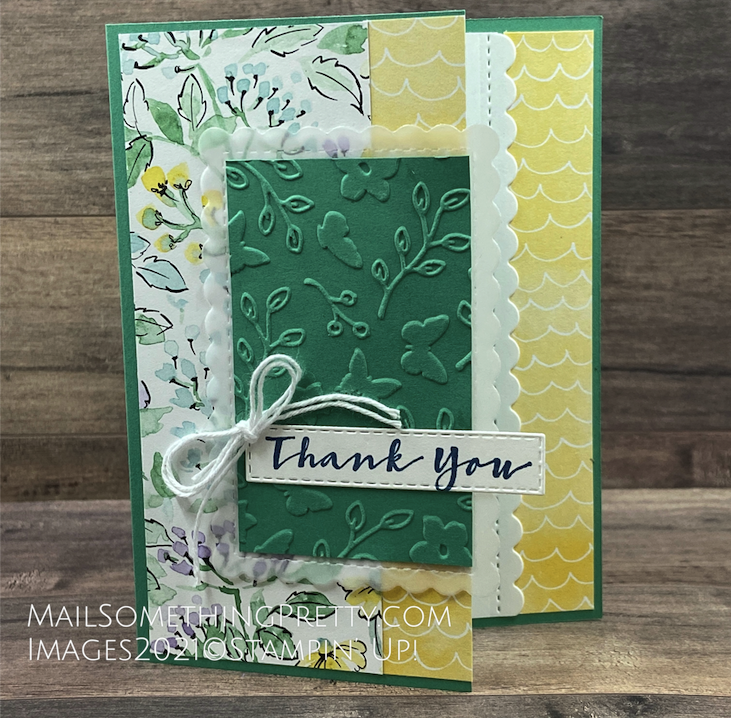
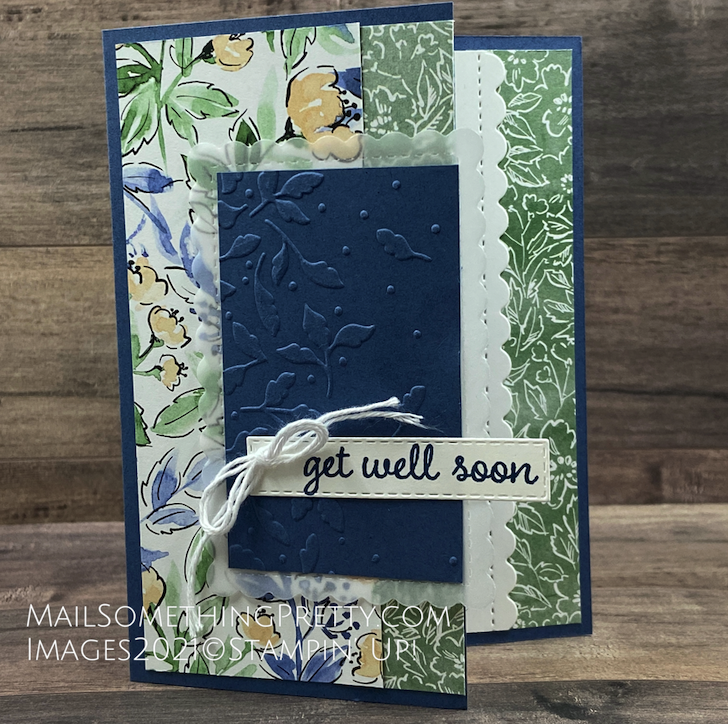
Last Friday I did a Facebook Live that lasted 55 minutes. Yikes!!!! You can watch the replay anytime by visiting my Facebook page: https://www.facebook.com/mailsomethingpretty/. The following card is one I made during the Live. I discovered while stamping & chatting that printed material shows backwards in Lives. Who knew?? All my measurements showed backwards. I decided to re-film this card so you could see how I made it AND read the measurements properly. I really enjoyed making this scallop edge card using hand-penned designer paper & scalloped contour dies and how you do too.
Video Tutorial
What did you think? Did you love the scallop opening as much as me? I can’t wait to make more cards using this format and all of the new designer papers.
Measurements
- Card Base – 7-1/4″ x 5-1/2″, scored at 3″
- Two Pattern Strips – 1″ x 5-1/4″
- Inner White – 3-3/8″ x 5-1/4″
- Outer Pattern – 2-1/8″ x 5-1/4″
- Solid Texture – 2″ x 3-1/4″
- Vellum Scallop Rectangle (2nd smallest die)
Supplies
- Hand-Penned Designer Series Paper
- Vellum
- Misty Moonlight Card Stock
- Basic White Card Stock
- White Twine
- Scalloped Contours Dies
- Hand-Penned Dies (can use only Scallop Contour Dies)
- Meadow Moments Embossing Folders
- Stampin’ Cut & Emboss Machine
- Multipurpose Liquid Glue
You can purchase any of these supplies here – www.mailsomethingpretty.com/shoponline
I really enjoyed making this scallop edge card using hand-penned designer paper & scalloped contour dies and how you do too.