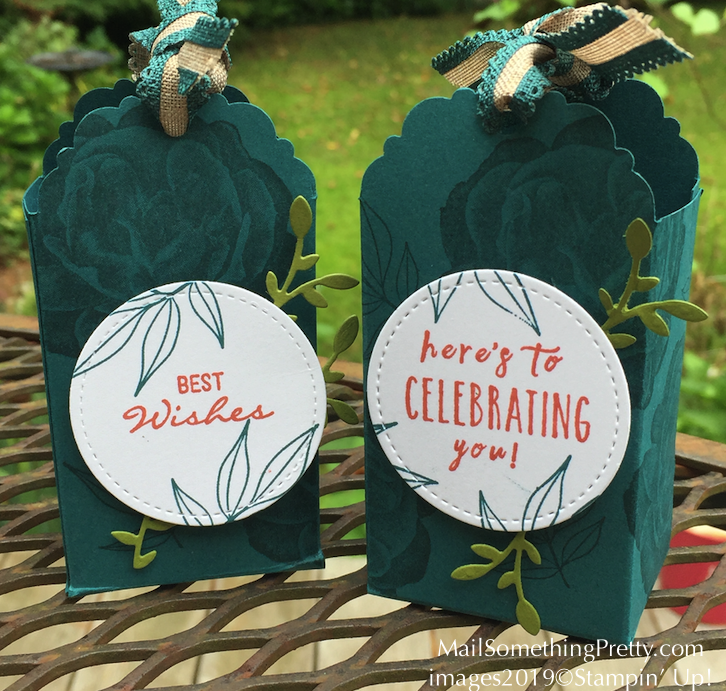
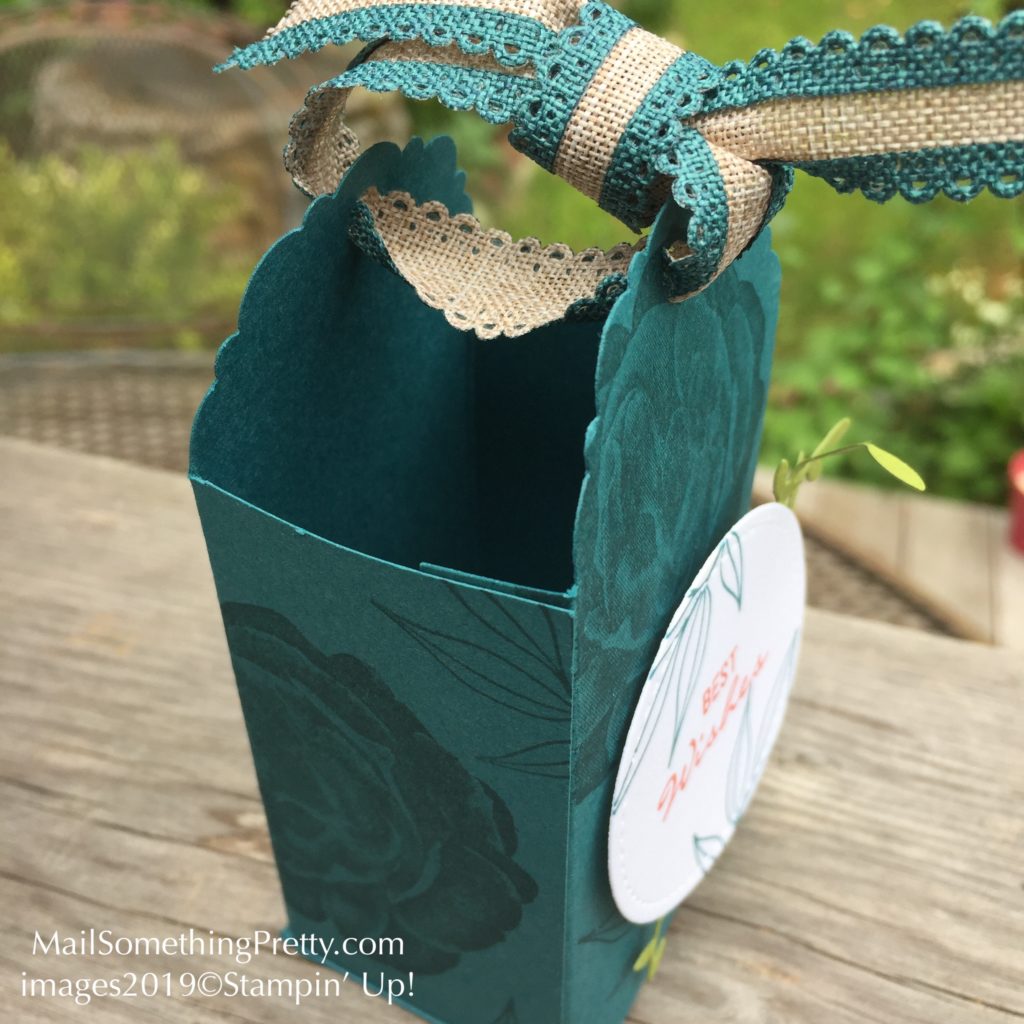
This is one of the easiest favor boxes I have ever created! Cut, score, punch, stick together and done. Create in any color, stamp with any background and top with any ribbon. I do recommend using regular card stock versus the Designer paper because the card stock is much thicker and stronger. The beauty and ease of creating this box is the decorative top you get from the punches. I encourage you to make your own favor box using the tag topper punches and know that you will make them again and again. Showers, birthdays, little thank you gifts….and even place settings. If you need any of the supplies & products, they are linked under the video tutorial..
Favor Box using Tag Topper Punches Video Tutorial
Favor Box Supplies, Measurements & Links
Pretty Peacock Card Stock, 5 1/2″ x 7 1/2″ (*as mentioned in the video, you can change the height of your box by increasing the 5 1/2″ size). Score 1 1/2″, 3 1/2″, 5″ and 7″. Flip and score at 1 1/2″.
Simply Scored Scoring Tool #122334
Delightful Tag Topper Punch #149518 or
Scalloped Tag Topper Punch #133324
Pretty Peacock Ink #150083
Healing Hugs Stamp Set #148223
Pretty Peacock 1/2″ Scalloped Linen Ribbon #149751
Tear & Tape Adhesive #138995
For label:
I used scrap Whisper White and cut the circle with my Big Shot & Stitched Shapes Dies #145372.
Botanical Bliss Stamp Set #151284
Coordinating Botanical Tags Dies #146824
Terracotta Tile Ink #150086
Dimensionals #104430
If you need any help with your order, please reach out to me and I will be happy to help.
Did you like the Healing Hugs Stamp set? Here is another post & video I made using the set.
https://mailsomethingpretty.com/tutorial-create-easy-flowers-with-pressed-petals-washi-tape/
~ Christine