This summer, Stampin’ Up! introduced a new adhesive called Seal. It comes in regular Seal and Seal+, which is extra strong for interactive cards or 3D projects. I have discovered that there is a bit of a learning curve with Seal. Seal is both similar and different from the Snail it replaced. They are both super sticky and strong. I want you to have a pleasant experience using yours, keep the stick where you want it. Keep reading for my Seal Adhesive & Glue Tips.
Seal Adhesive

When you come to the end of your Seal, there is a red marking – no more guessing if it’s done. Pop the case apart & replace with a refill. But before you replace it:

Clean both sides of the casing to get the “gunk” out. There will most likely be sticky residue on the edges of the case. Pull & wipe it away. If there is gunk, it will stick to the Seal you are trying to spread on your card stock and create unwanted issues. Even if you are halfway through your Seal, you can pop the case open & clean. ** Don’t forget to clean gunk out of the cover too.
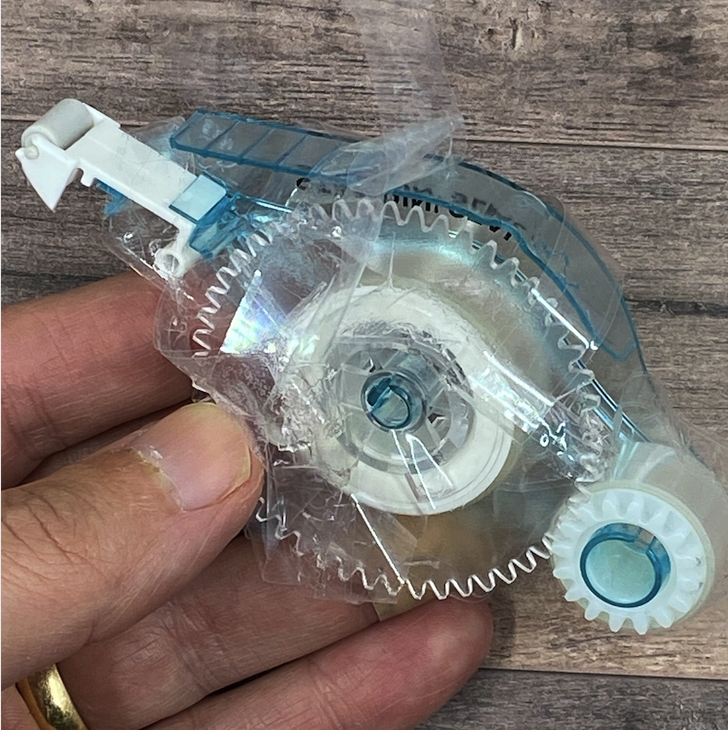
This is one of those types of issues that can result. I think there was some sticky gunk on the case that stuck to the rotating Seal and loosened up the plastic runner. An unfixable mess!
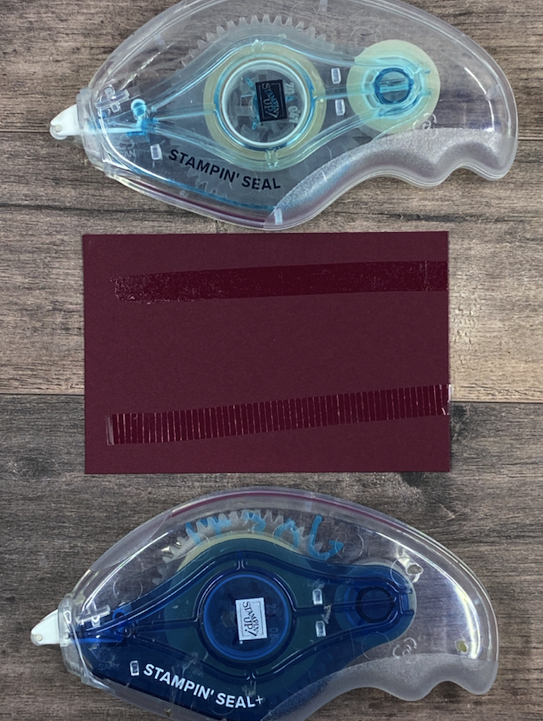
Seal and Seal+ are both shown in this photo. The top adhesive is Seal. It’s very sticky and strong, but you need to do a little forward wrist rotation before releasing the Seal from the paper to get a good cut. If you just lift up after using, you most likely will get a sticky string that will affect the inner workings of the Seal (photo above).
The bottom Seal+ is even stronger than the Seal. The Seal+ replaced the Fast Fuse. Do you see how it looks different from the Seal with the lines? Those lines are individual perforations that create instant cuts when you lift up the Seal+ from the paper. No wrist action needed and no gunky residue. If you are having trouble with the Seal, you may want to consider using the + for all projects, even though it’s designed when you need a stronger hold, such as boxes or interactive cards. It does cost a few extra dollars, but you don’t need to use as much since it is super strong so the cost works out to be the same.
Quick Video on Using Seal
Multipurpose Liquid Glue
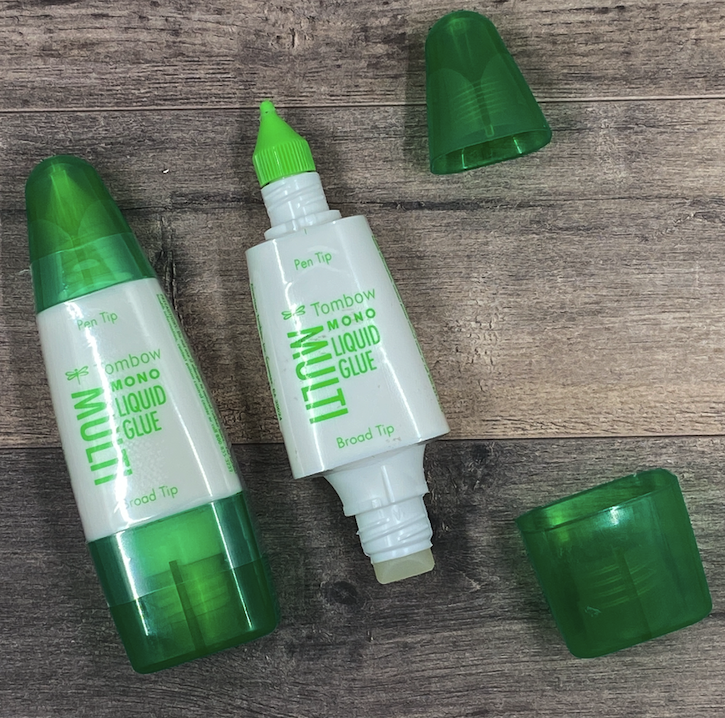
Did you know there are two tips on the Multipurpose Liquid Glue? A fine tip and a glue stick. It’s a surprise I love sharing because not many know about the glue stick option. **Try not to get any glue on the outside of the tube because it will remain sticky/tacky for a long time.
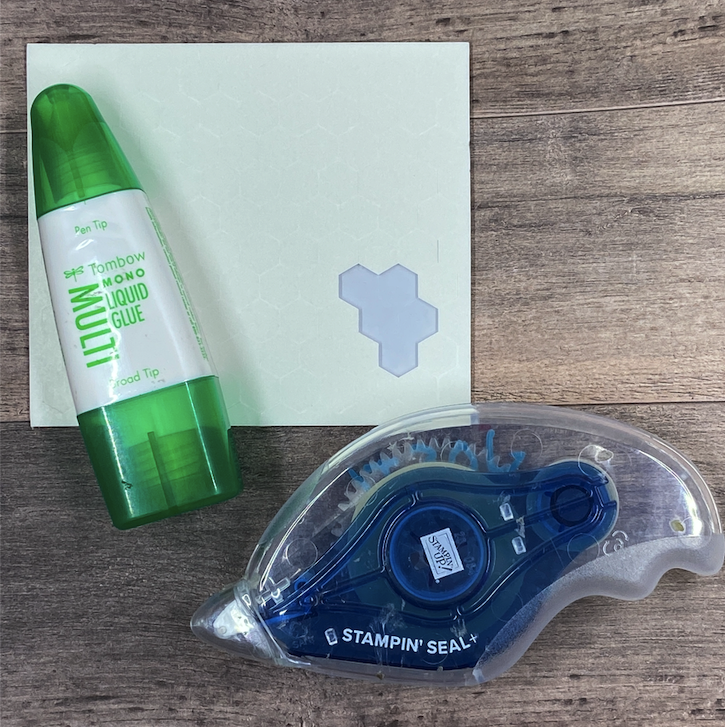
My adhesive recommendations are Multipurpose liquid glue, Dimensionals and Seal+. I think these 3 will cover all your adhesive needs. Some of you may have noticed I’m using glue more often in my videos. It’s easy to use, gives you a moment to shift before dry if necessary and a little goes a long way which makes if a great value for $4.
I hope today’s tips & recommendations help you out with your crafting! Happy Creating!Christine
| Stampin’ Seal Adhesive– 152813 Stampin’ Seal Refill – 152814 Stampin’ Seal + Adhesive – 149699 Stampin’ Seal+ Refill – 152812 |
| Multipurpose Liquid Glue – 110755 Dimensionals -104430 |