
All you need to create the box is card stock, a paper trimmer, scoring tool, scissors and glue. Everything you probably already have. I use all Stampin’ Up! products because their quality, color coordination and options are superior. I am a Stampin’ Up! Demonstrator and am happy to recommend, answer any questions and/or help you with your paper crafting. You can contact me at christine@mailsomethingpretty.com with any questions and shop with me anytime at: www.mailsomethingpretty.com/shoponline.
Be sure to bookmark this page so you can find it in the future. It can not be searched on my site as it is a private page.
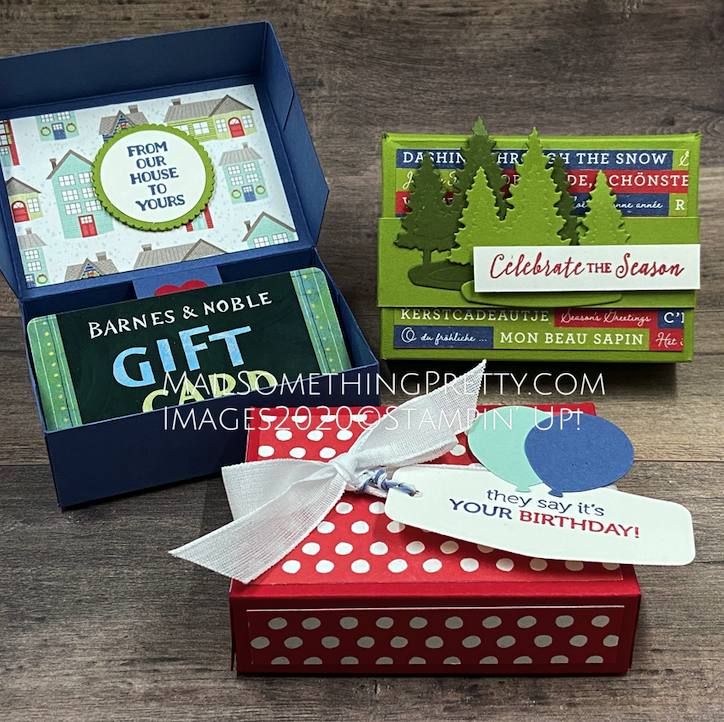
Gift Box Video Tutorial
Measurements:
- 8″ x 5-1/2″ of card stock, score at 1″, 3-1/2″, 4-1/2″ and 7″. Flip and score at 1″ and 4-1/2″.
- Inside “rest box” – 1″ x 5″, score at 1″, 2″, 3″ and 4″
- Top of box patterned paper – 3-1/4″ x 2-14″
- Optional front, back & side panels: front & back 3-1/2″ x 3/4″ (cut 2) and sides 2-1/4″ x 3/4″ (cut 2)
- Belly Band, 1″ x 11″
Turn your own gift card box into any gift giving occasion – thank you, birthday, holiday gift or just because. They can also be turned into party favors, stocking stuffers, place settings and more. You are not limited to using it for a gift cards – stuff the box with cash, candy, jewelry, tea bags, trinkets or anything else you can fit into a 3-1/2″ x 2-1/2″ x 1″ box. Change up the colors, decorative papers belly band/ribbon and toppers.
If you have any questions about this tutorial, would like more tutorials, or information about Stampin’ Up!, their products and the opportunity to save on their products, please do not hesitate to reach out to me: christine@mailsomethingpretty.com.
Thank you! Christine